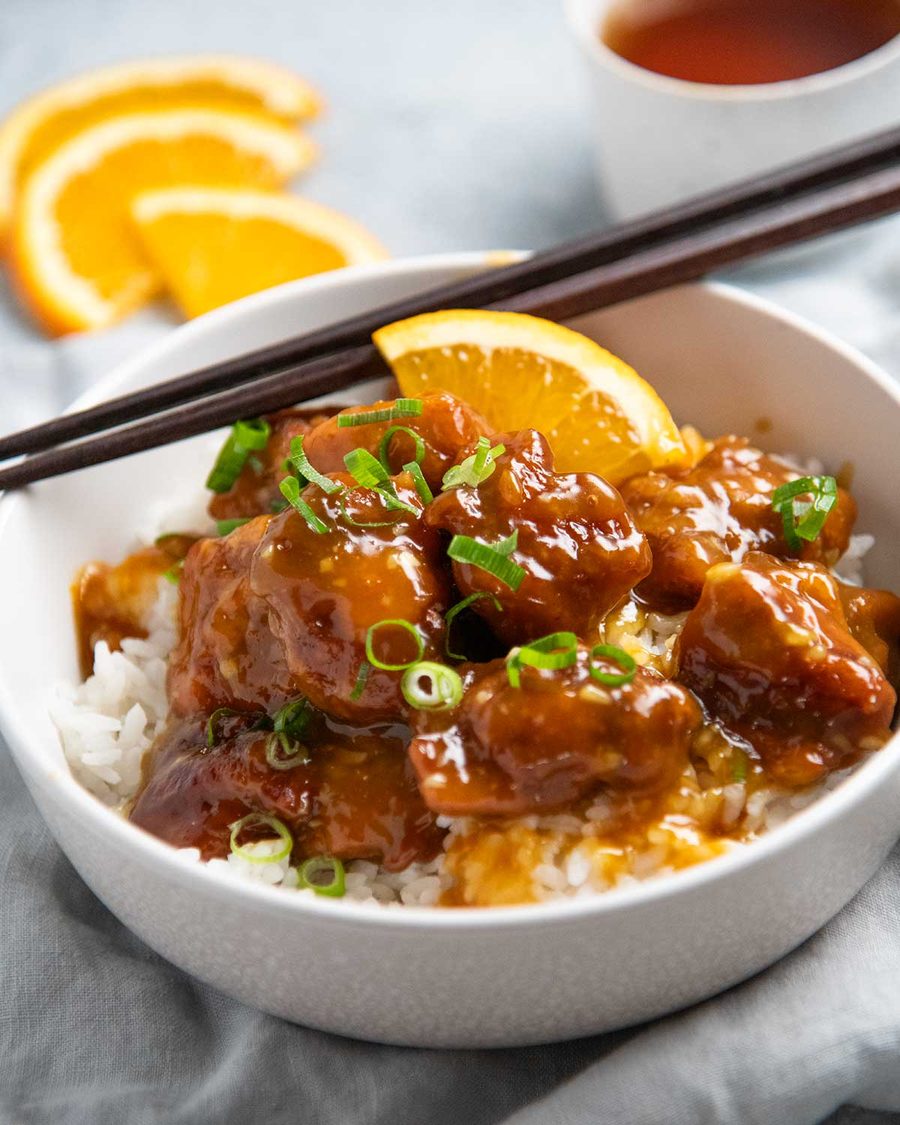
This is a recipe for Chinese Orange Chicken that makes impressively crispy chicken pieces without deep frying. The sauce has great orange flavour, it’s not too sweet, and I love the background hint of ginger!
Contents
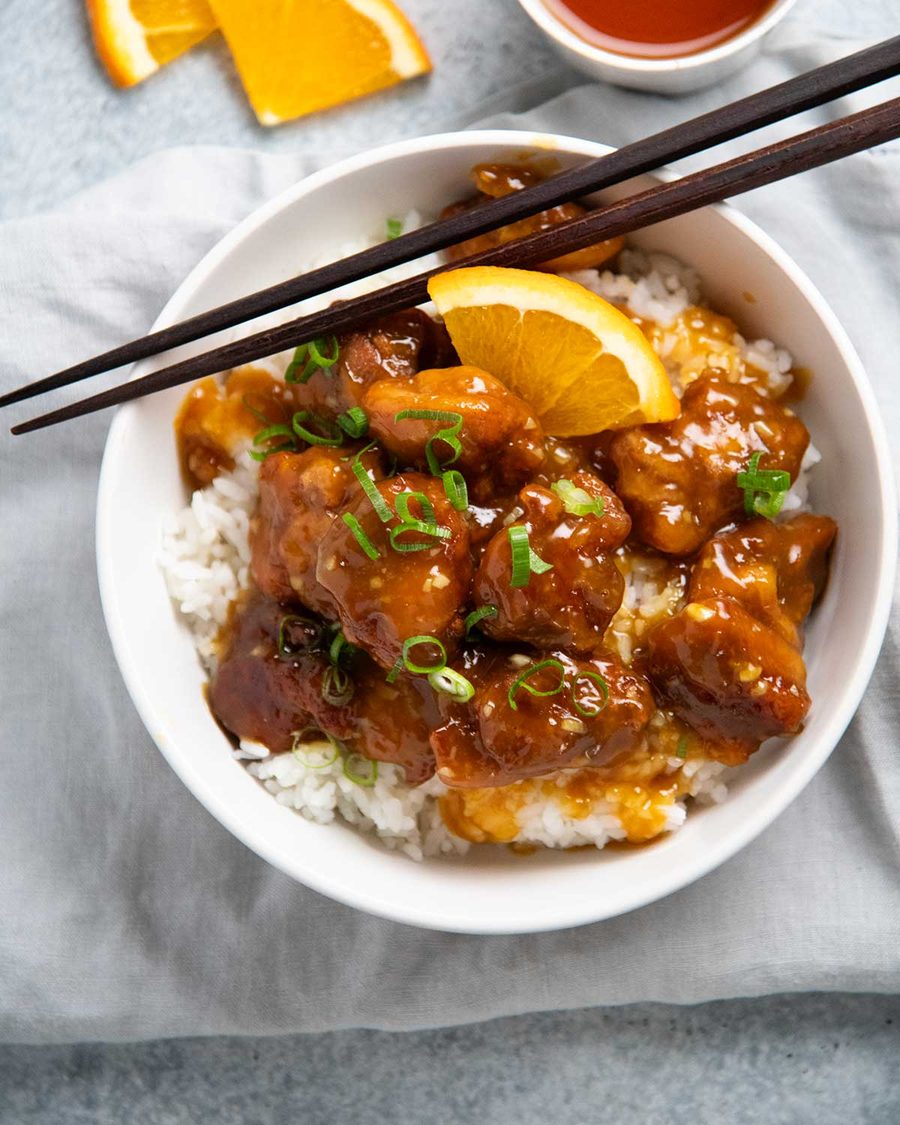
Chinese Orange Chicken
Orange Chicken is a Chinese American take-out favourite. As someone who’s generally very suspicious of fruit touching my meat, I was surprised by how much I enjoyed it the first time I tried it. Crispy chicken coated in a sweet-savoury citrus sauce, it’s the sort of dish that’s dangerously easy to keep going back for “just one more piece” until all of a sudden….WHO ATE ALL THE ORANGE CHICKEN???!!!
Traditionally, the chicken is deep fried. But today we’re using the shallow-frying method I use for my Crispy Thai Pork Bites that delivers seriously good deep-fried-style results with a fraction of the oil. The chicken comes out golden and crunchy, and it’s a straightforward method where you won’t be left with a pot of used oil to deal with afterwards. Yay!
Ingredients in Orange Chicken
Here’s what you need to make this.
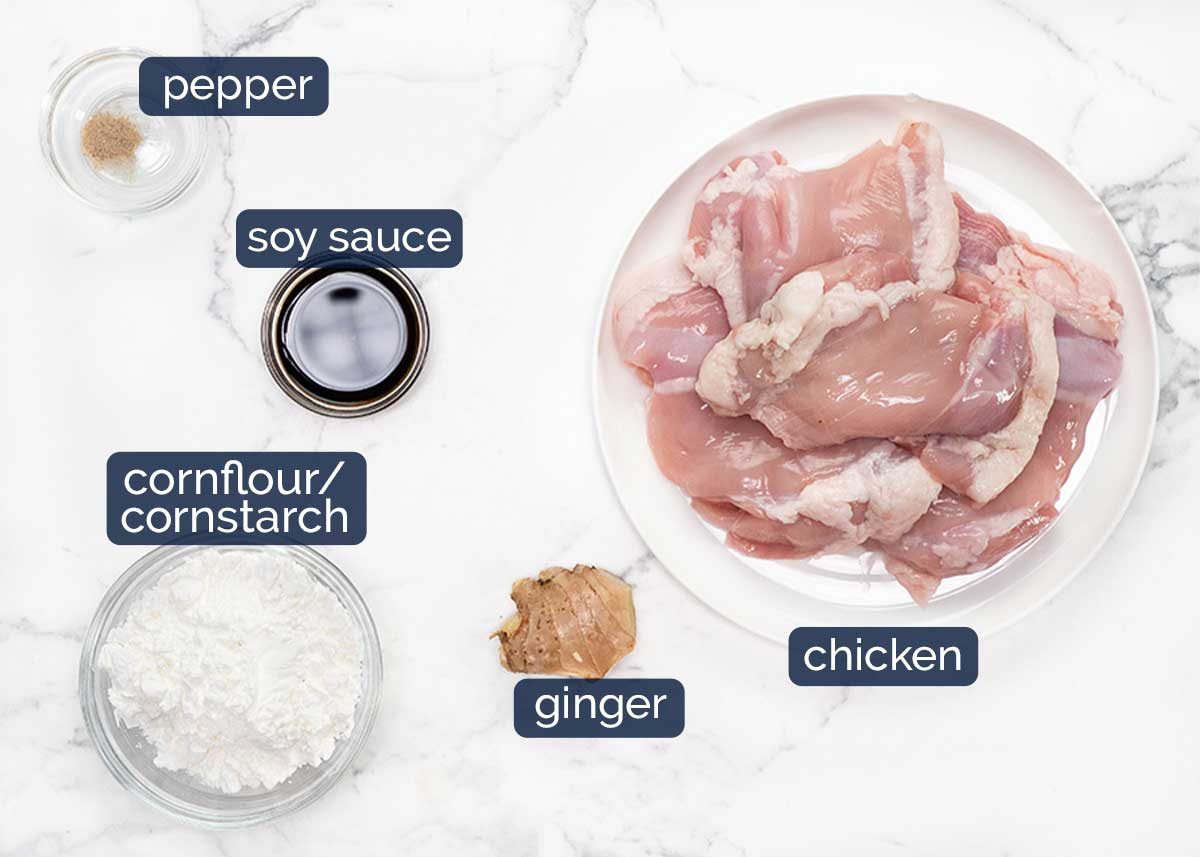
1. For the crispy chicken
Oops, I forgot to include oil. 🙂 I’ll include chatter about it though!
-
Chicken – You can use either thighs or breast. I personally prefer thigh because it’s juicier.
-
Soy sauce – This is the salt for the chicken. Use either light soy or an all-purpose soy. Do not use dark soy or sweet soy, these are too intense!
-
Ginger – A hint of ginger flavour on the chicken is so good! But it’s optional.
-
Cornflour / cornstarch – This is what makes the chicken crispy. It fries up crispier than flour, and stays crispier for longer.
-
White pepper – For seasoning. You can substitute with black pepper.
-
Oil – Vegetable, canola, peanut or any other neutral flavoured oil. You need enough for 0.5cm / 0.2″ depth in the pan. Using a 30cm/12″ pan which is what I am using, it’s about 1 cup.
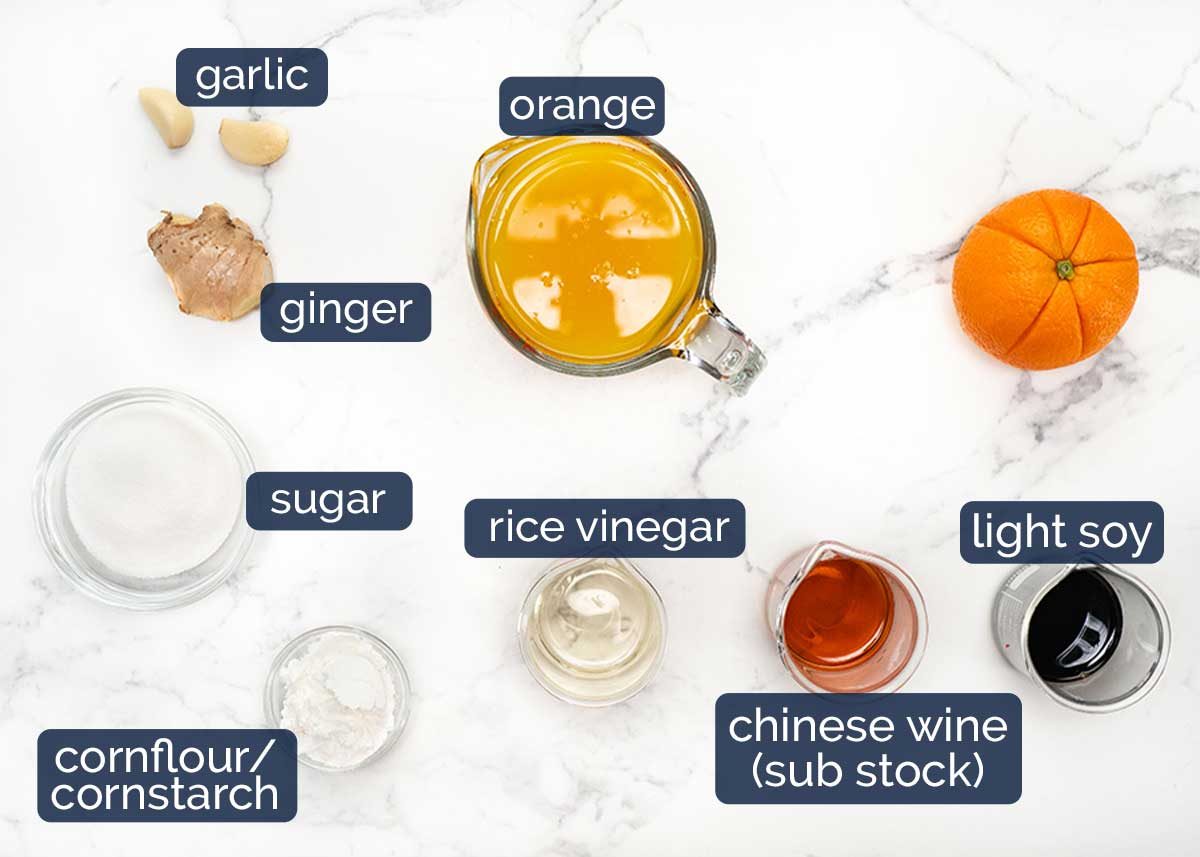
2. for the orange sauce
The key to a good orange sauce is making sure it actually tastes of orange! Using zest is essential because that’s where most of the orange flavour comes from. A short simmer time matters too – the longer you cook it, the more that fresh citrus flavour fades. To help the sauce thicken quickly without prolonged simmering, I use a little more cornflour than you typically see in orange sauce recipes.
-
Orange – We need both zest and orange juice, so you need at least one orange. For the juice, yes of course it is best if you juice fresh oranges but you can also use fresh bottled orange juice.
-
Ginger and garlic – I love to flavour the sauce with these. The garlic is sautéed to make it toasty while the ginger is grated and simmered in the sauce which makes the ginger flavour a little fresher which I like.
-
Soy sauce – This is what adds most of the salt in the sauce. Use either light soy or an all-purpose soy. Do not use dark soy or sweet soy, these are too intense and will ruin your sauce!
-
Chinese cooking wine (Shaoxing wine) – This adds salt into the sauce as well as depth of flavour. Without, I personally find the sauce tastes a little flat. If you can’t consume alcohol, you can use chicken stock/broth instead.
-
Rice vinegar – I think vinegar is essential here to balance the flavours, else it just tastes sweet. If you don’t have rice vinegar, regular white vinegar will be fine.
-
Cornflour / cornstarch – This is what thickens the sauce, and makes it shiny and glossy.
-
White sugar – Orange sauce is a sweet sauce, but I think you will be surprised how it doesn’t taste sickly sweet, like candy. If you reduce the sugar in the recipe, the sauce tastes more savoury than what Orange Chicken should be, but if you are ok with that, feel free to go ahead!
How to make crispy Chinese Orange Chicken – without deep frying
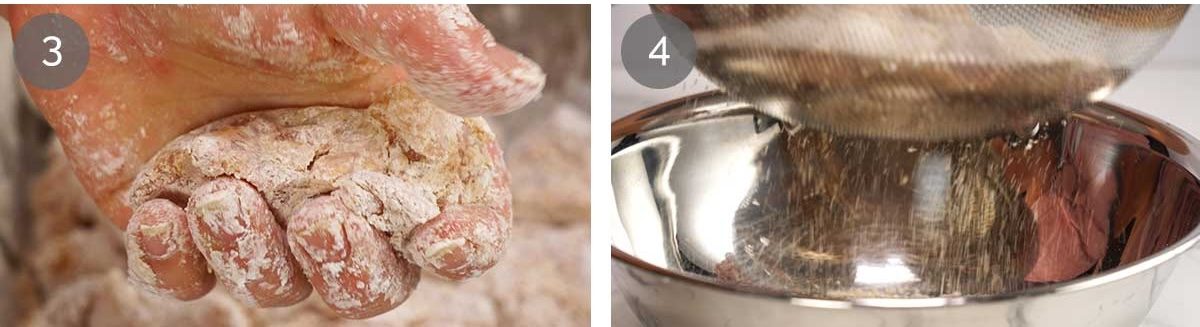
There’s only one little extra step here that needs to be done to achieve deep-fry level crispiness without deep frying: grabbing fistfuls of the cornflour dusted chicken and clenching them in your fist to press the cornflour on firmly.
If you are happy to deep fry, you can skip this step – but that’s the only step you can skip!
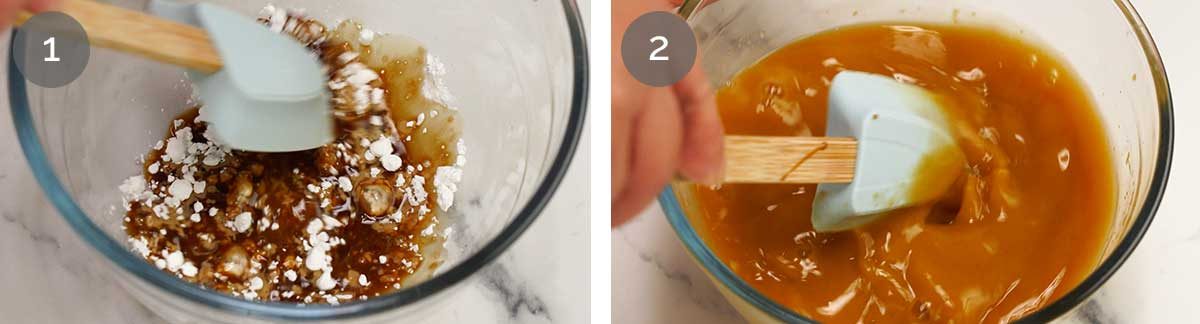
1. ORANGE SAUCE
Mix up the sauce first, ready to pour into the pan at the end.
-
Cornflour first – Whisk the sauce ingredients in a bowl or large jug. Start with cornflour and soy sauce first, whisk until lump free. We do this before adding the other liquids because it’s easier to mix in cornflour using just a bit of liquid.
-
Finish sauce – Then whisk the remaining liquids – orange juice, soy sauce, vinegar, sugar and Chinese cooking wine. This will only take a couple of minutes on the stove to thicken into a shiny, glossy sauce which we will do right at the end, then toss the chicken in just before serving.
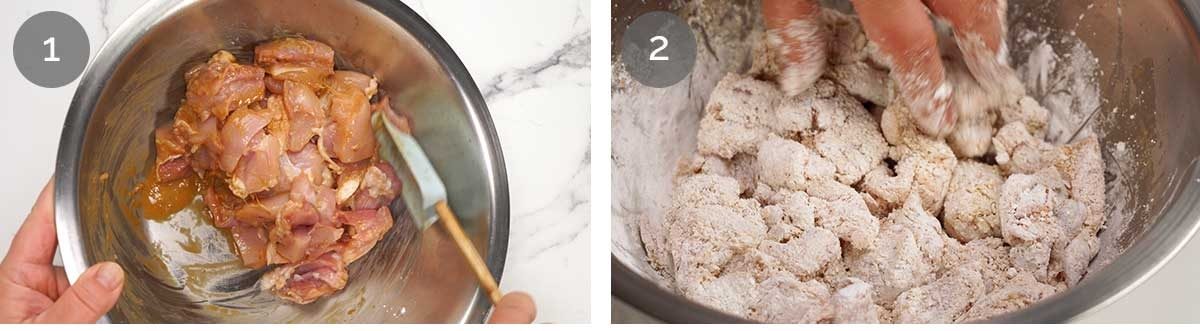
2. COATING THE CHICKEN
-
Sticky coating for chicken – Put the chicken pieces in a large bowl and mix it with the soy sauce, 2 tablespoons of cornflour, ginger and pepper. The coating will look kind of milky and it will be sticky, acting like a glue for the cornflour coating.
There is no need to use egg. Fun fact – when you dredge in egg, it makes things less crispy, which is why I generally only use it for breadcrumb coated things.
-
Cornflour coating – Then add the cornflour into the bowl and toss to coat each piece. You’ll need to get in there and separate pieces that stick together. I did warn you that the cornflour coating is like a glue!!
-
Press – Grab a few pieces of chicken in your hand and enclose your fist – this will press the cornflour onto the surface of the chicken. Then drop it in a colander set over the sink. Use both hands, and do a few pieces in each, and you’ll fly through this step in no time!
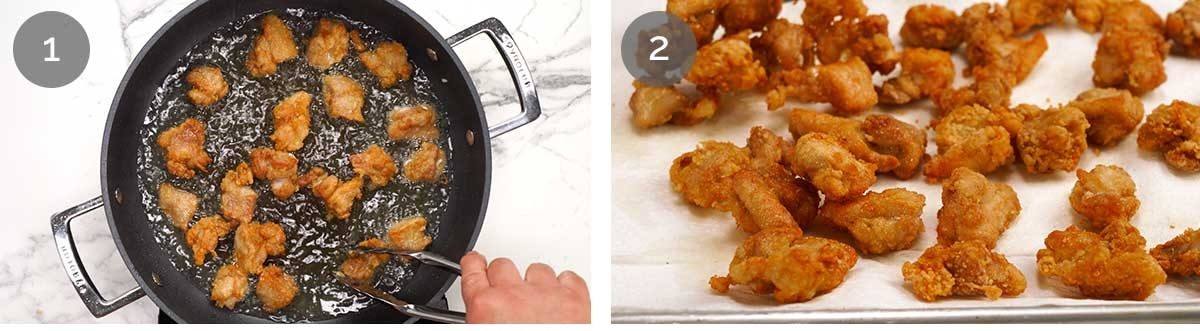
-
Shake the colander to let the excess cornflour fall through the holes. This step is important for a couple of reasons. Firstly, too much cornflour = powdery coating. It’s not nice! Secondly, the excess cornflour will fall off when cooking and burn, and because we are shallow-frying rather than deep frying, these burnt bits will get stuck on our chicken pieces. Again, not nice!
3. cooking
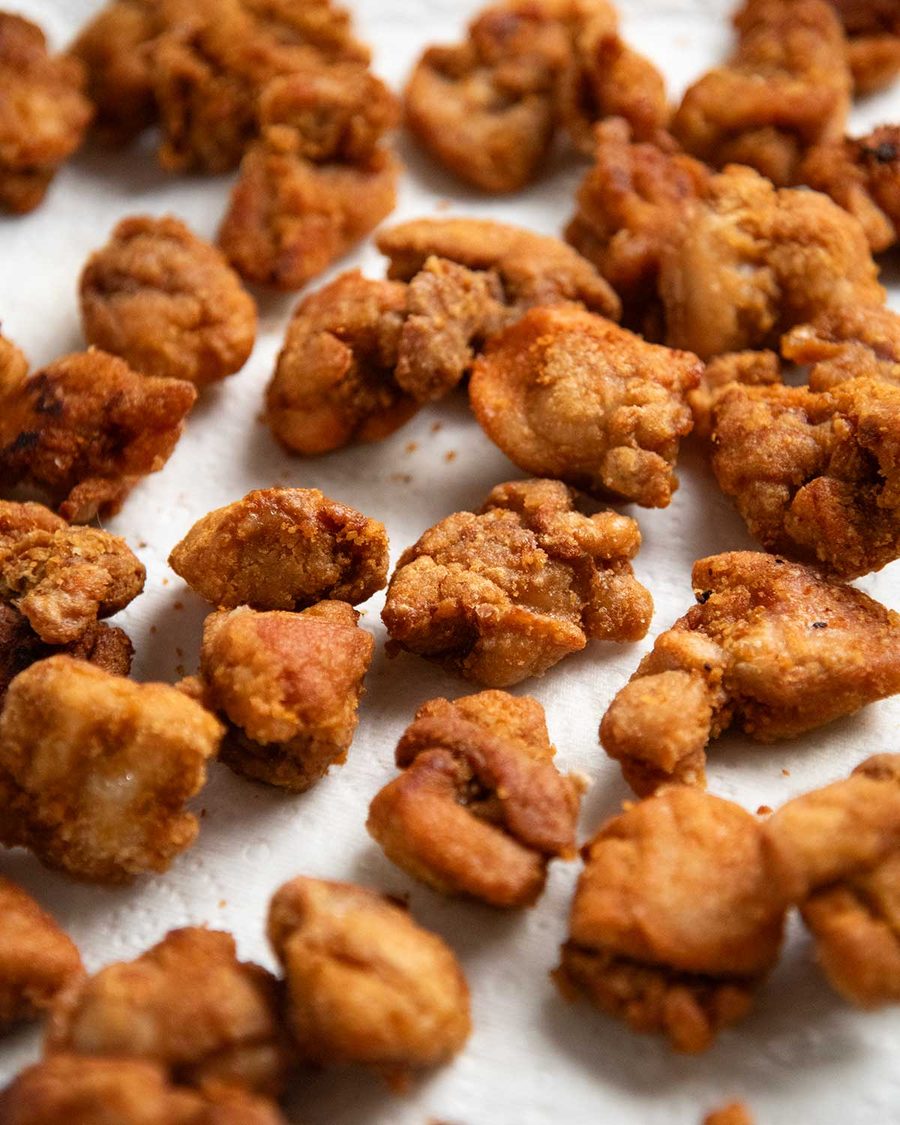
Key here is using high heat and cooking the chicken until deep golden and crispy. Not just light golden, not just golden. We want DEEP golden!
-
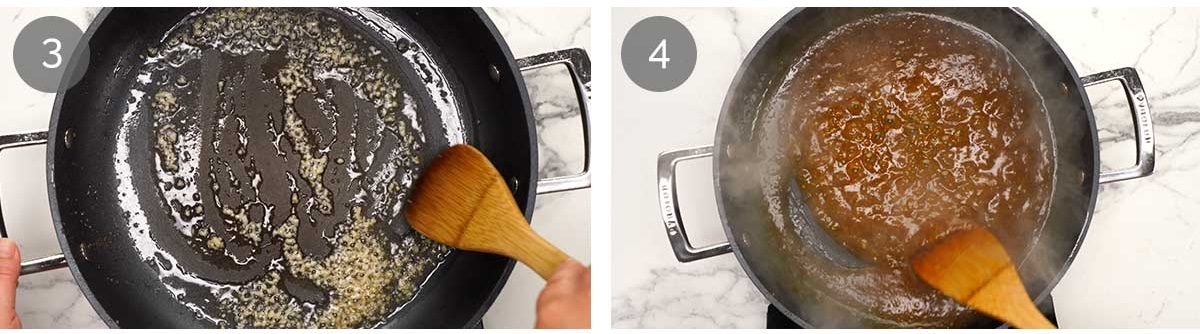
Shallow-fry – Heat just 0.5cm / 0.2″ of oil on high heat in a large non-stick pan. Mine is 30cm/12″ – the larger it is, the more chicken you can cook in each batch! The oil should be hot enough so that the chicken sizzles energetically as soon as it hits the oil.
Cook the chicken for 1 1/2 minutes on each side until it is deep golden and crispy. Use tongs to turn, long ones if you’ve got it, as the oil does sputter a bit. Fill the pan with as many pieces of chicken as you can as long as they are not touching each other. I can usually cook it all in 2 batches.
-
Drain the chicken on a paper towel lined tray and cook the remaining chicken.
-
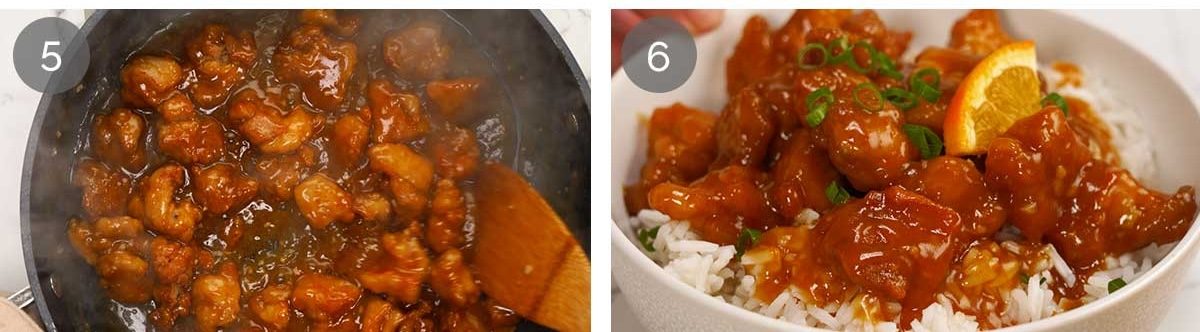
Sauté – Pour off all but 2 tablespoons of the oil and scrape out any loose bits. Then return the pan to the stove and sauté the garlic and ginger just for 20 seconds, until light golden.
-
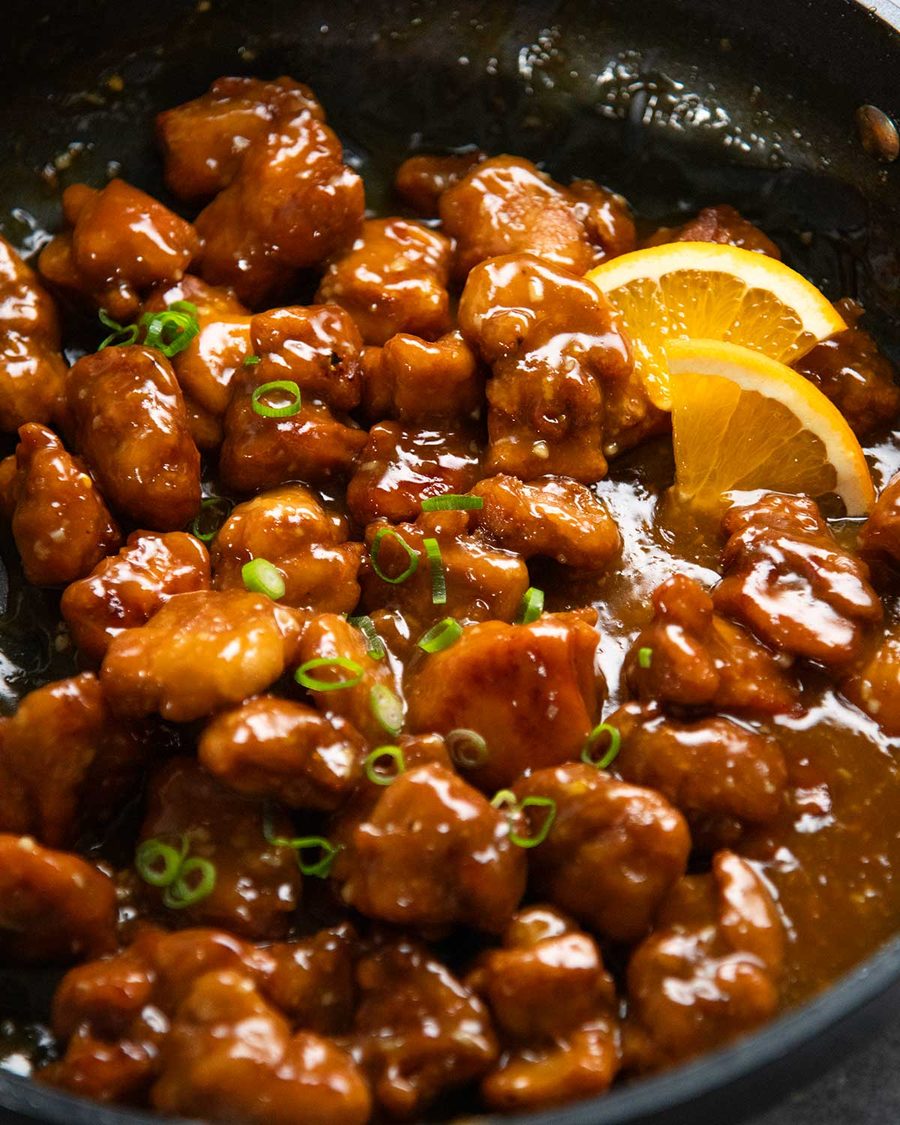
Simmer – Then pour in all the sauce (give it a good whisk beforehand to agitate cornflour settled on the base) until it thickens into a glossy sauce that is the consistency of honey. It will only take 1 1/2 to 2 minutes. Speed is good here because it preserves the orange flavour – the longer you simmer, the more flavour is lost! Then stir in the orange zest at the end. This keeps the orange flavour fresher and more vibrant than if it were simmered in the sauce.
-
Toss the chicken through the sauce as quickly as you can to preserve the crispiness of the chicken.
-
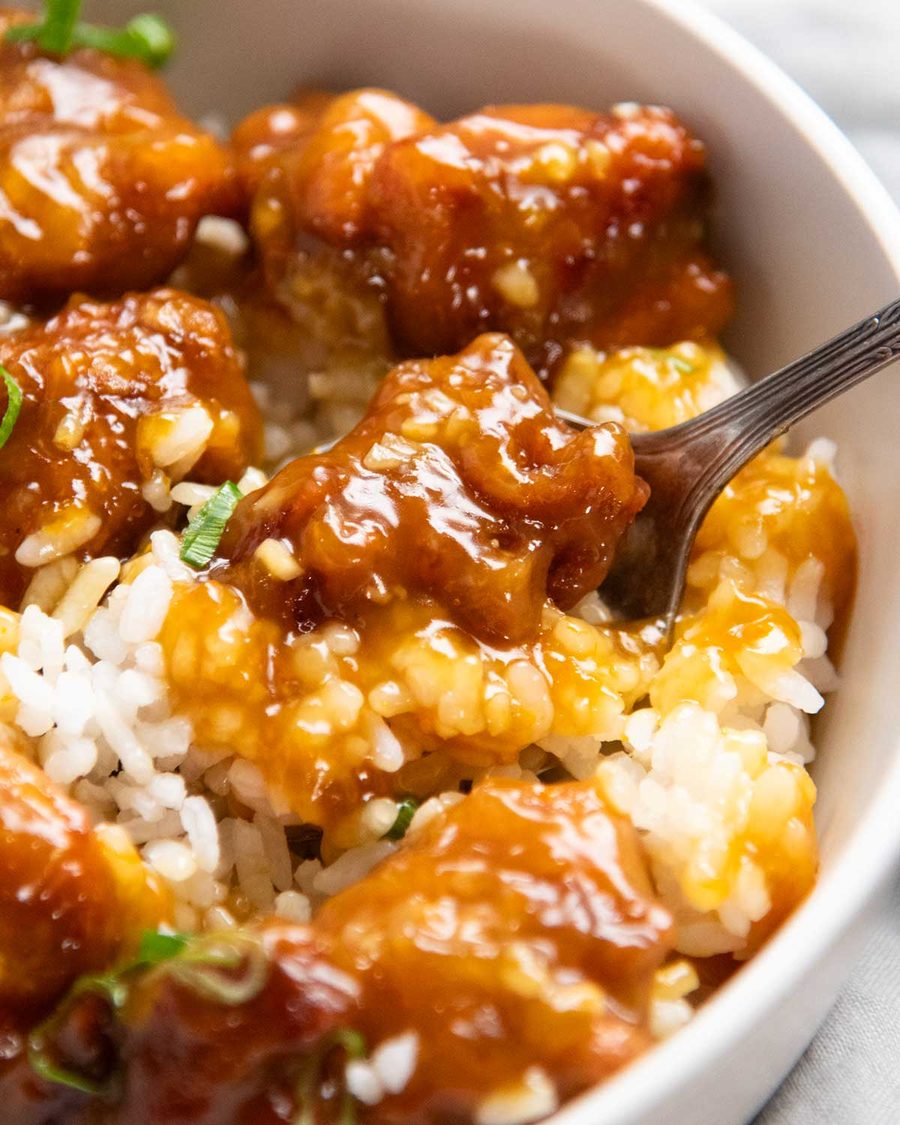
Serve over rice, garnish with green onion and sesame seeds if desired!
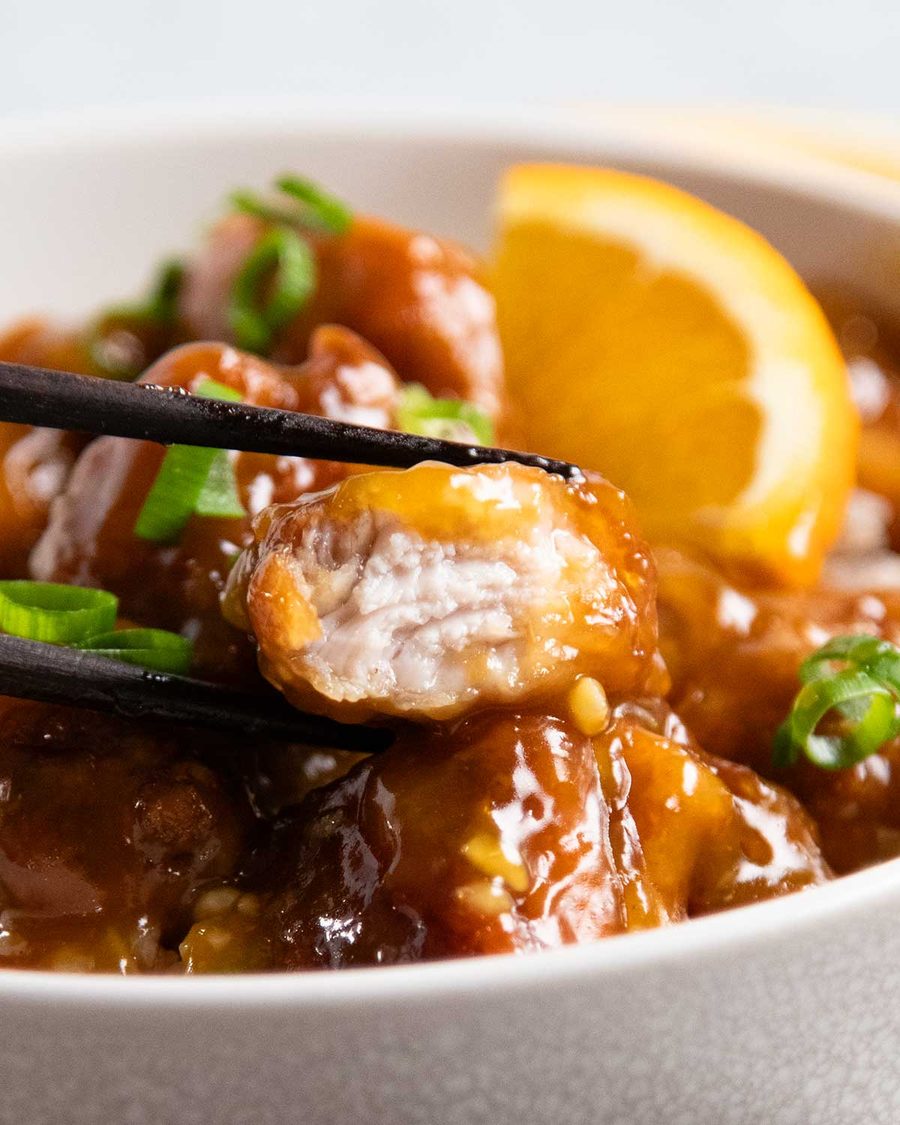
A note on crispiness!
A quick note on crispiness, just so nobody accuses me of false advertising! Once the chicken is tossed in the sauce, it does lose some of its crispiness. You’ll still get crispy edges, but it won’t stay shatteringly crisp like the battered shell of, for example, Honey Chicken, which has stronger staying power but can’t be shallow-fried like in this recipe.
Aside from the coating difference, the other reason is that Orange Sauce is water-based, so it soaks into the coating more easily. Other sauces, like Honey Chicken and Sweet and Sour Pork, on the other hand, are coated in sauces based on thicker things like honey or ketchup that sits more on the surface better, helping the crispiness last much longer.
That said, this isn’t a flaw – it’s just the nature of Orange Chicken. Whether you’re eating it at home, at your local takeaway or in a restaurant, the sauce softens the coating, and in fact the sauce-soaked surface is part of what makes Orange Chicken SO GOOD!!!
Hope you get a chance to try it. – Nagi x
Watch how to make it
Hungry for more? Subscribe to my newsletter and follow along on Facebook, Pinterest and Instagram for all of the latest updates.
Chinese Orange Chicken
Prep: 20 minutes
Cook: 15 minutes
Main
Chinese, Chinese American
Servings4
Tap or hover to scale
Prevent screen from sleeping
Instructions
ABBREVIATED RECIPE
-
Mix chicken with soy, ginger, pepper and 2 tbsp cornflour, then coat in remaining cornflour. Clench few pieces in fist, shake off excess cornflour in colander. Shallow-fry until deep golden. Remove oil, sauté garlic, simmer sauce 2 min until thickened. Add zest, toss chicken, serve!
FULL RECIPE
-
Orange sauce – Whisk the cornflour and soy sauce in a large jug or medium bowl until lump free. Then whisk in everything else except garlic and orange zest. Set aside.
-
Coat chicken – Mix the chicken pieces with the soy sauce, ginger, pepper and the 2 tablespoons of cornflour in a large bowl. Mix well – the coating becomes a bit sticky and acts as a glue. Add the 3/4 cup cornflour and toss to coat each piece, separating as needed (they stick together a bit).
-
Press and shake off – Pick up a few pieces and enclose in your fist, to really press the cornflour on. Place in a colander, then repeat with remaining chicken. Shake colander so excess cornflour falls through the holes. This press-and-shake method is highly effective crispy no-fry technique! (Note 3)
-
Shallow-fry until crispy – Heat the oil on high heat in a large deep non-stick pan (mine is 30cm/12″). The chicken should sizzle straight away when you dip it. Spread half the chicken out (or as much as you can, without crowding), and cook for 1 1/2 minutes on each side, using tongs to turn, until deep golden and crispy. Remove onto a paper towel lined tray and repeat with remaining chicken.
Orange sauce:
-
Sauté – Pour out all but 2 tablespoons of the oil, and scrape out any loose crispy bits. Return the pan to medium high heat. Sauté garlic until light golden, about 20 – 30 seconds.
-
Thicken sauce – Give the sauce a whisk (to mix cornflour settled on the base) then pour it in the pan. Simmer for 1 to 2 minutes until it thickens into a thick, glossy syrup (honey consistency). Stir in zest.
-
Toss – Put the chicken back into the pan and toss quickly to coat in the sauce. Serve over rice, garnished with green onion.
Recipe Notes:
2. Chinese cooking wine – adds saltiness and depth of flavour into the sauce. Substitute with same amount of cooking sake. For non alcoholic, use 1/4 cup low sodium chicken stock/broth and expect to simmer for an extra minute or so for the sauce to reduce.
3. Crispy coating method – Scrunching the chicken pieces in your fist helps the cornflour to adhere to the skin well. We don’t use egg because egg = less crispy coating (fun fact!). Shaking off excess well is important to ensure you don’t end up with a powdery coating, also because we are not deep frying, excess cornflour will burn on the base of the pan and end up sticking onto your chicken pieces.
Leftovers will keep for 3 to 4 days in the fridge. Minus crispiness, but it’s still great!
Nutrition is coming!! Ran out of time!
Life of Jaffle
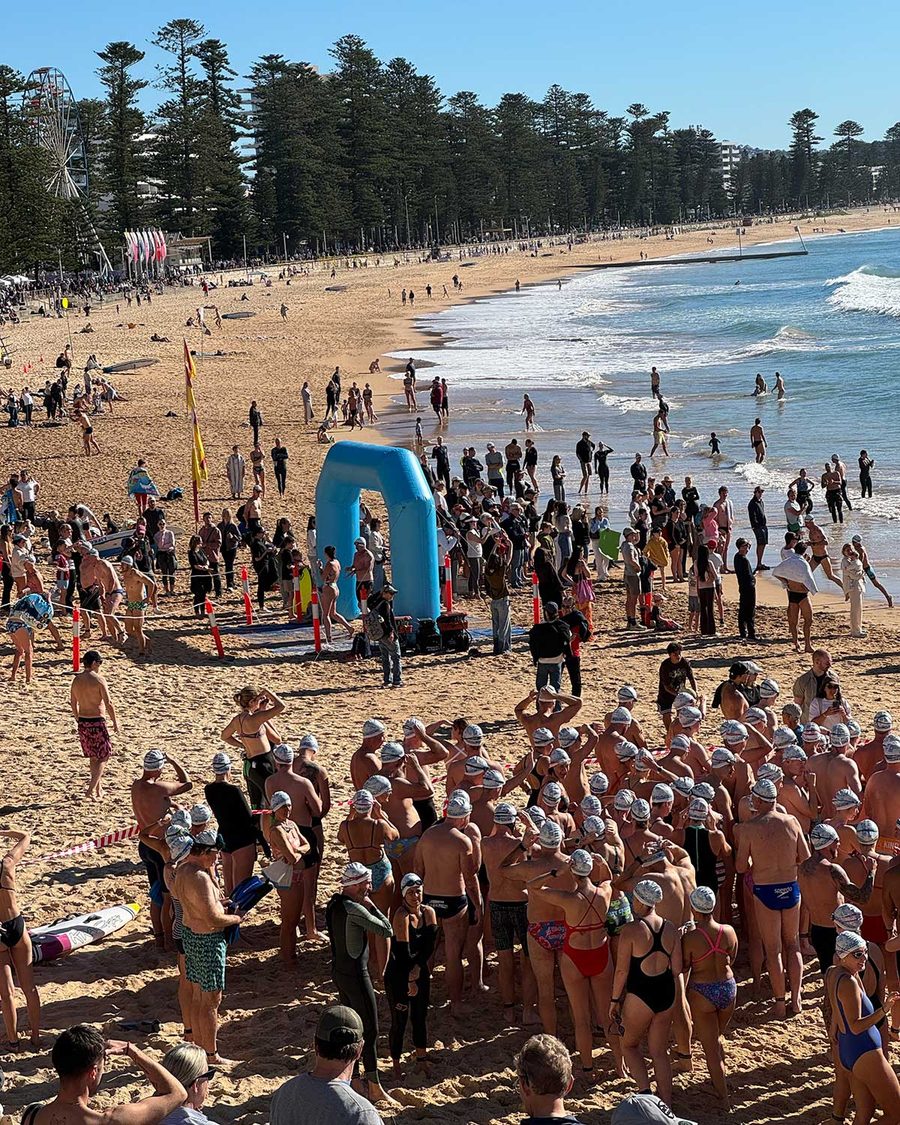
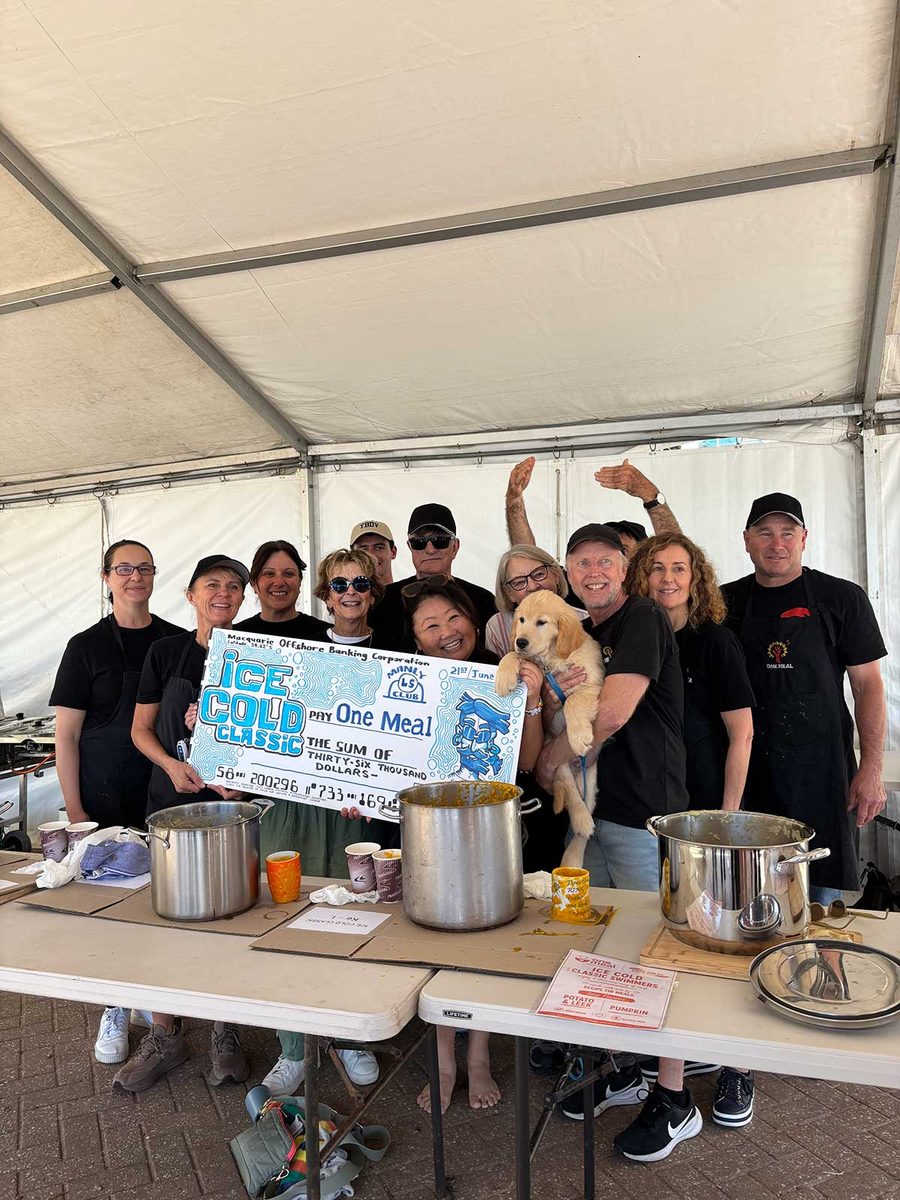
Jaffle attended his first charity event last weekend!!
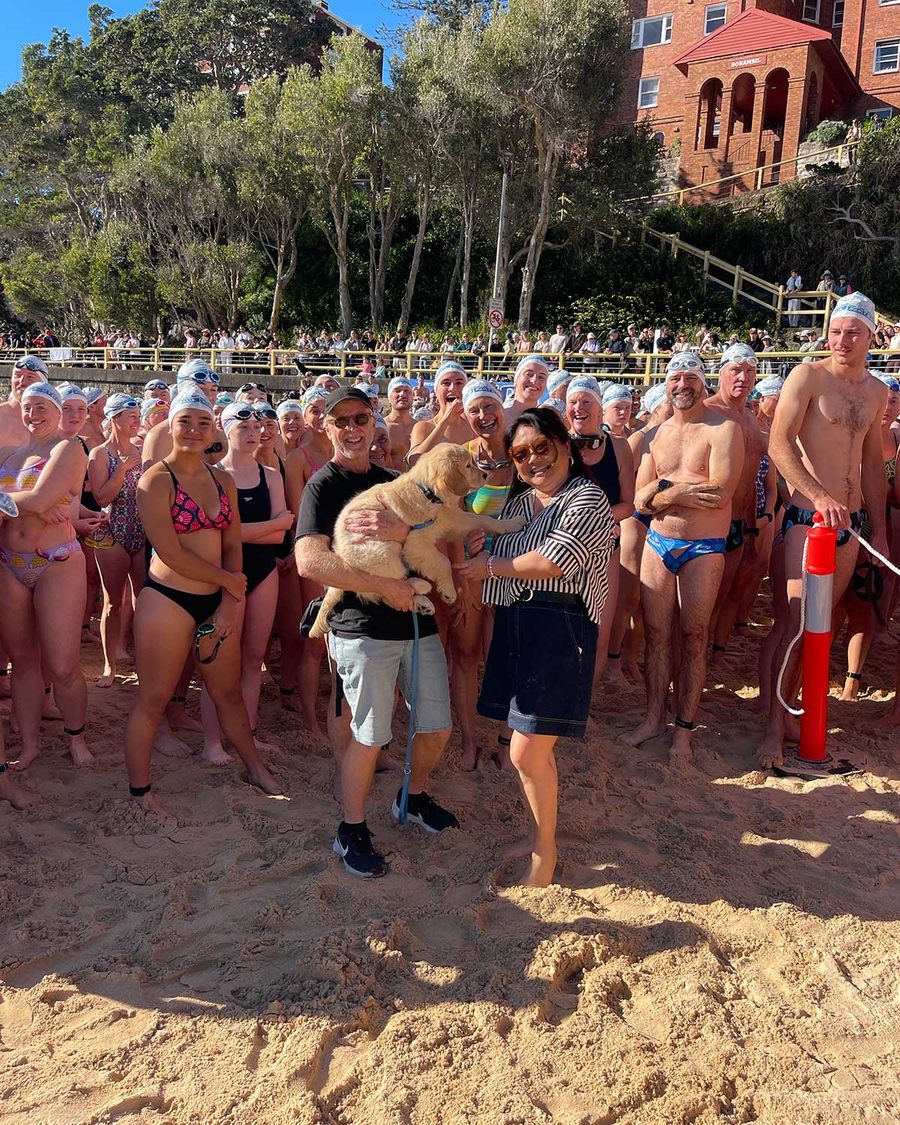
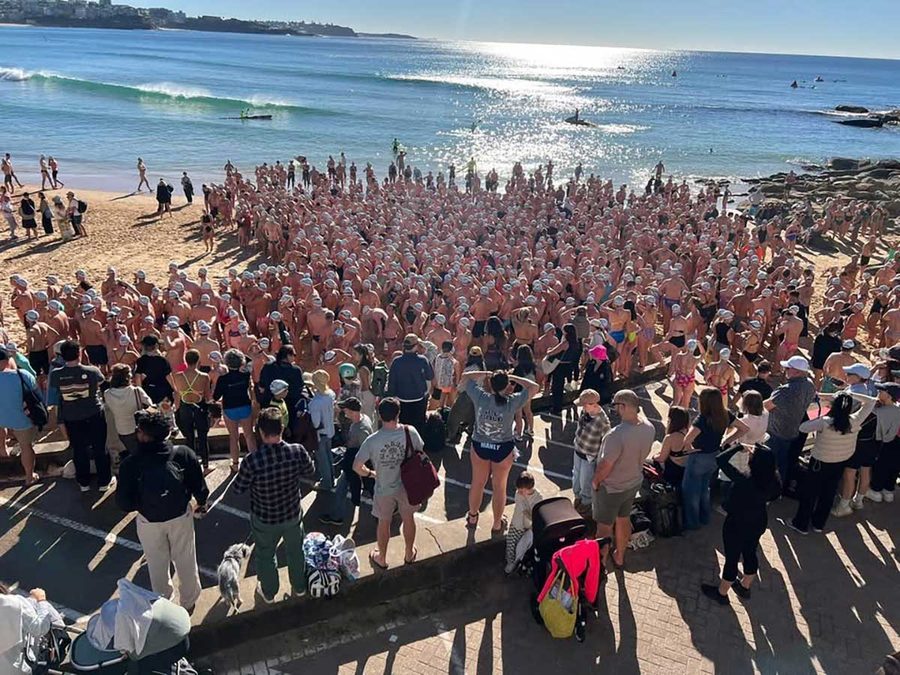
It was the Ice Cold Classic arranged by the Manly Life Saving Club at Sydney’s Manly Beach where 1,600 swimmers braved the ice cold winter ocean to raise money for One Meal Northern Beaches, the not-for-profit organisation that delivers the meals we make at RecipeTin Meals to the vulnerable.
It was a cracker of a day!! Clear blue sky, warm weather (winter??!!), a fantastic turnout, and a lot of very brave people willingly plunging themselves into water temperatures that I couldn’t bring myself to do!!
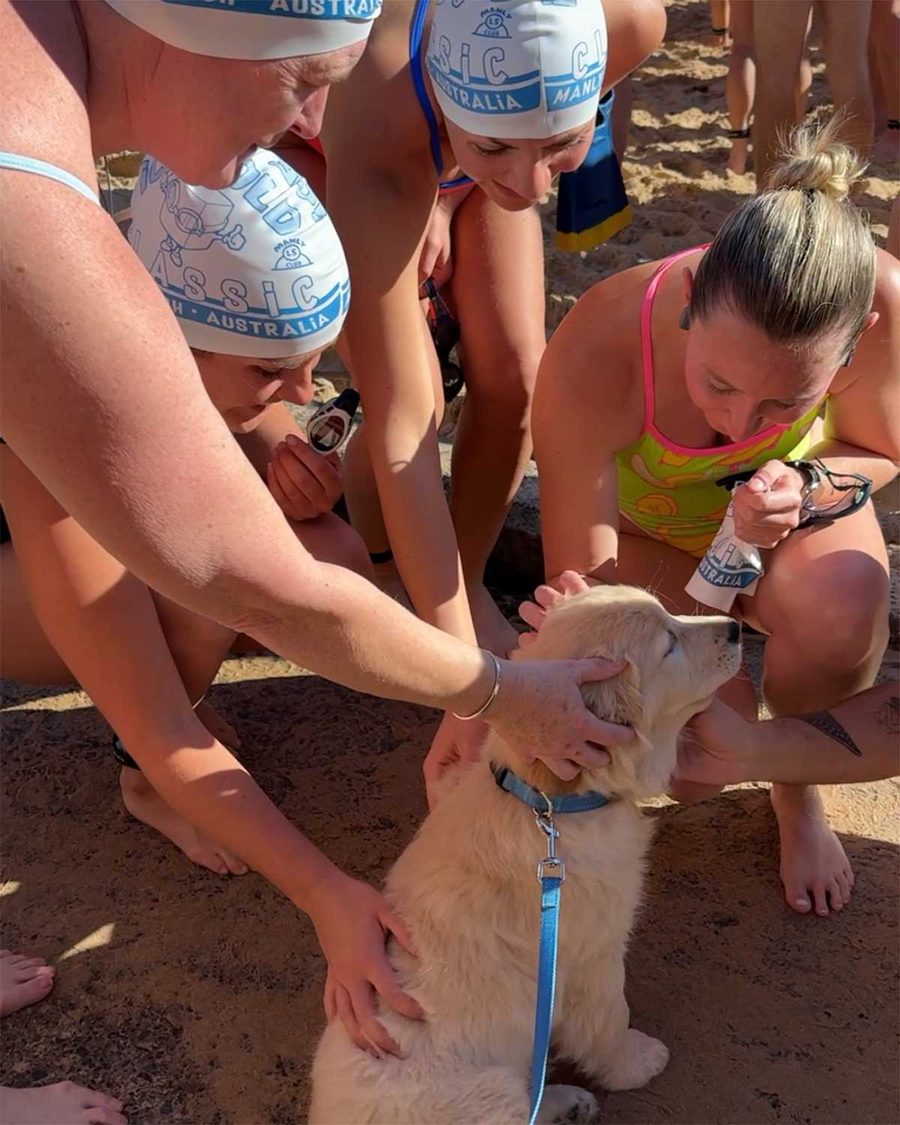
As for Mr Jaffle, when I say he “attended’ what I really meant is that he spent 3 hours being cuddled by strangers, posing for photos and generally behaving as though he was the guest of honour. Which, to be fair, he kind of was. 😂

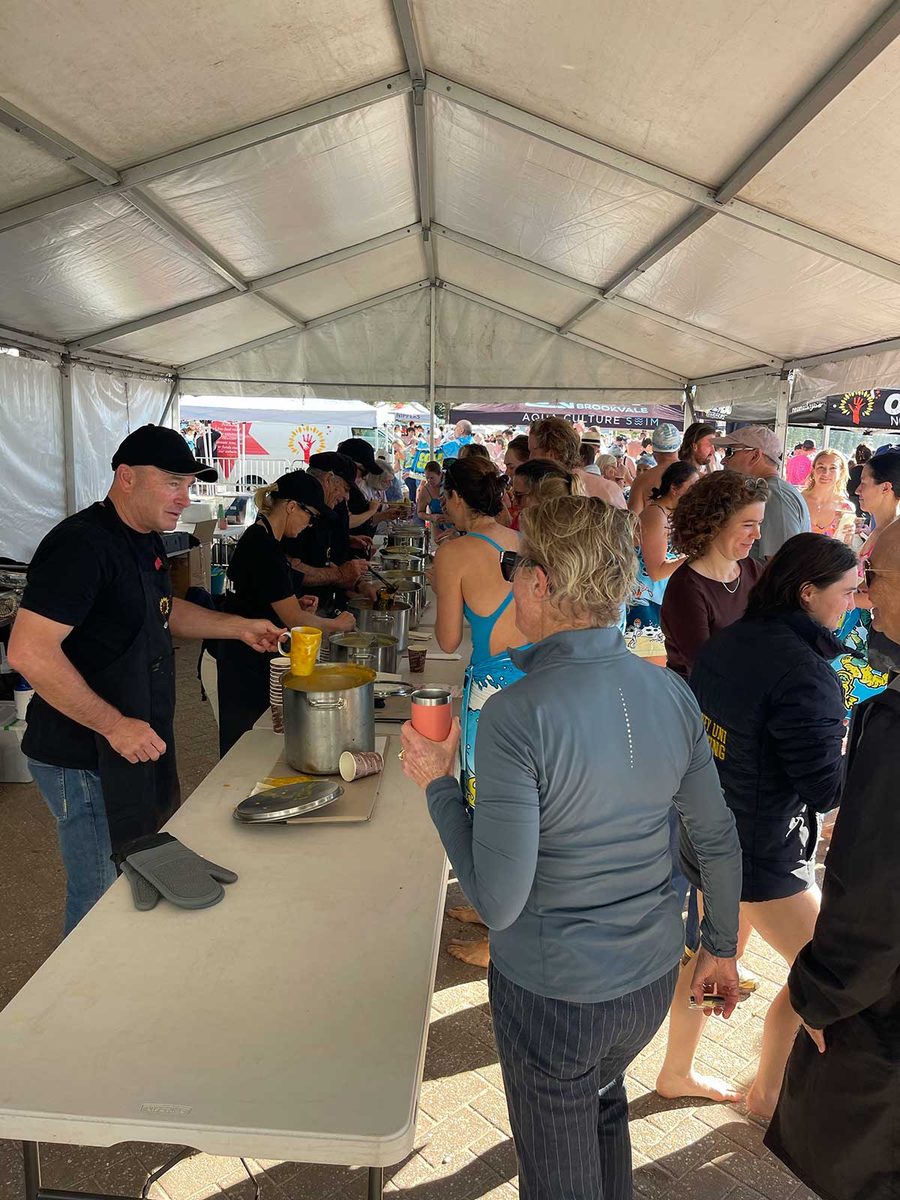
My team at RTM also made soup for the swimmers to enjoy after the race! Just 350 litres of Pumpkin Soup and Leek and Potato Soup….I don’t even know how much that is! 350 litres!!!
I was so proud of Mr Jaffle. It’s only been a fortnight since I brought him home, and he hasn’t been out much because he’s not fully vaccinated yet.
He went from his tiny little world of home, the backyard and a handful of familiar faces to a beach packed with thousands of people, dogs, loudspeakers, music and general chaos. I wasn’t quite sure how he’d cope, but he took it all in his stride and was lapping up the attention!
Mind you, all that socialising clearly took it out of him. The final photo was taken when we got home. He collapsed into bed and slept for hours. Turns out being adored by thousands of people is exhausting work. 😂

Love you, my sweet little Jaffle. Watching you take it all in with such confidence made my heart swell. Dozer would be so proud of you. Community events were always my favourite things to do with Dozer, and it was pretty special having you by my side for this one. ❤️

