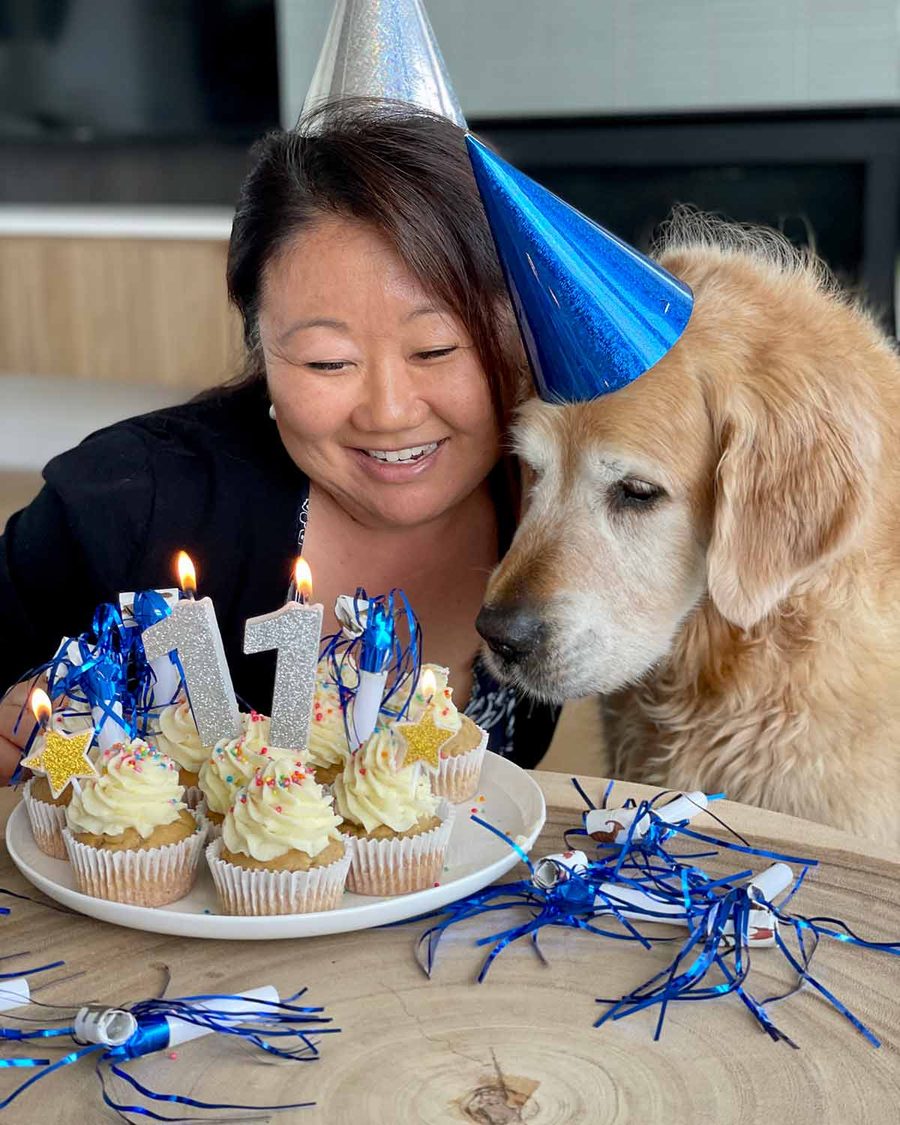
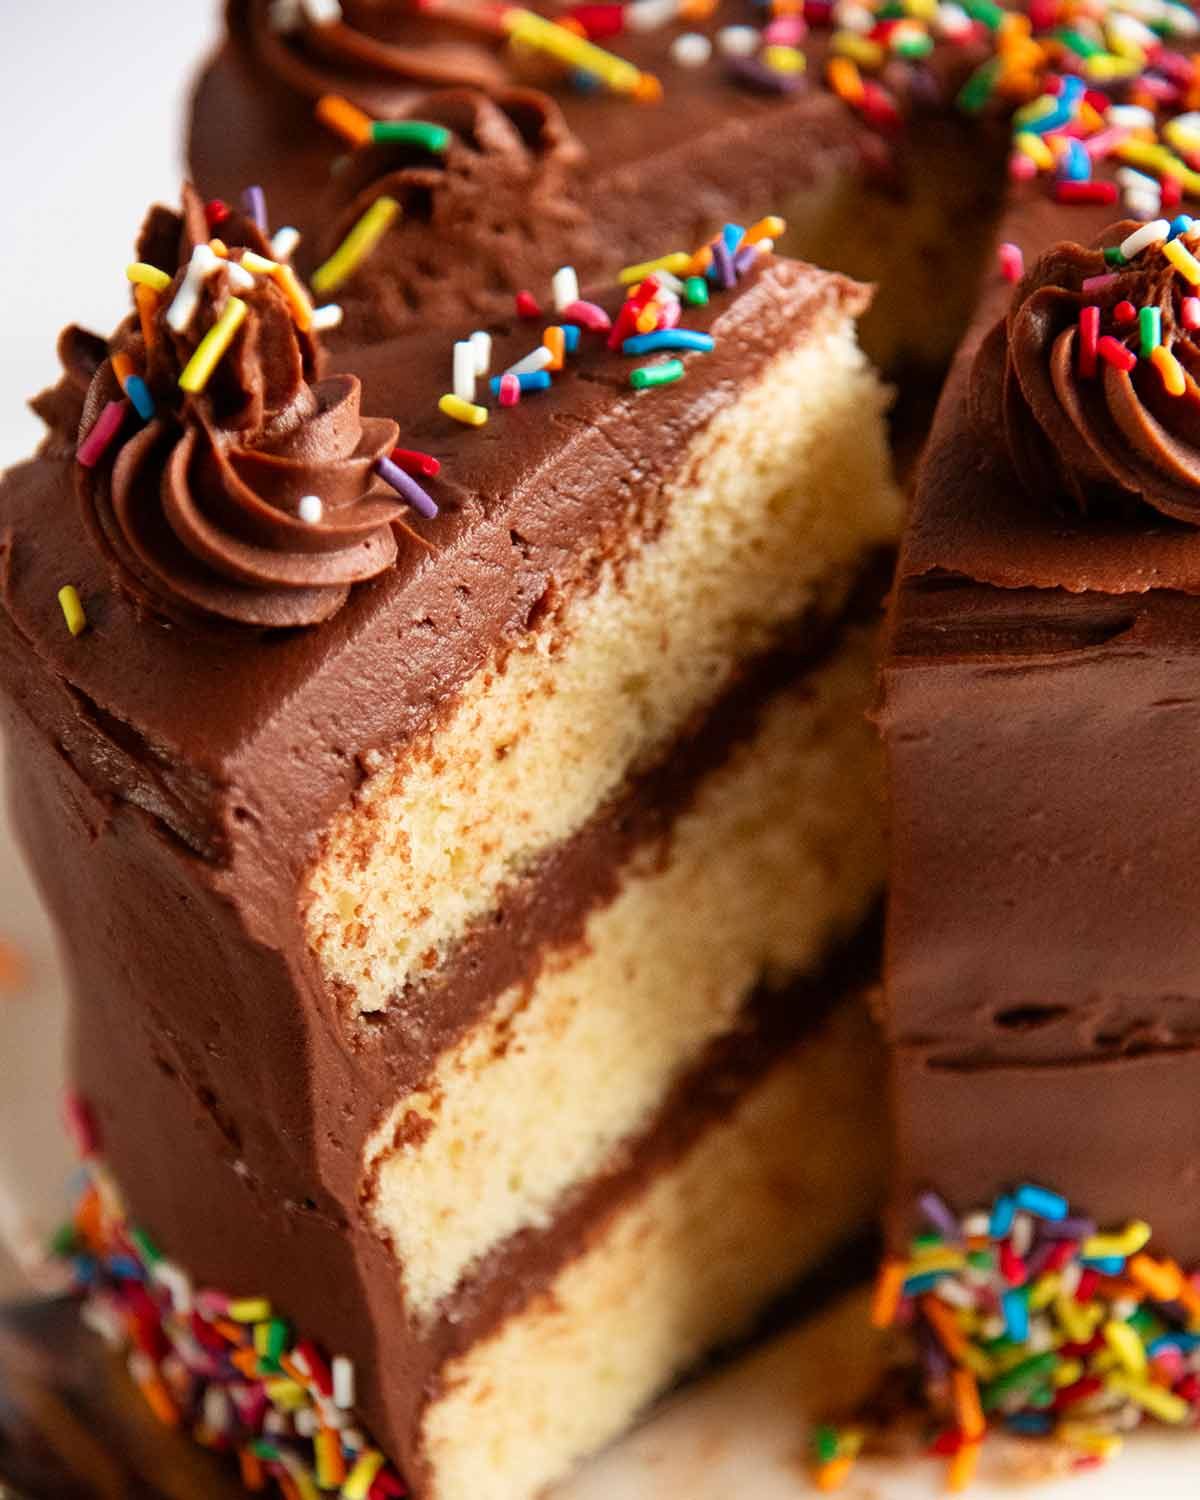
This is a classic 3 layer Birthday Cake recipe with soft, buttery vanilla cake layers and my favourite chocolate frosting which tastes like the best chocolate mousse you’ve ever had! A special celebration cake dedicated to Dozer, for the 13 birthdays I got to have with him, and the first without.
Contents
Birthday cake
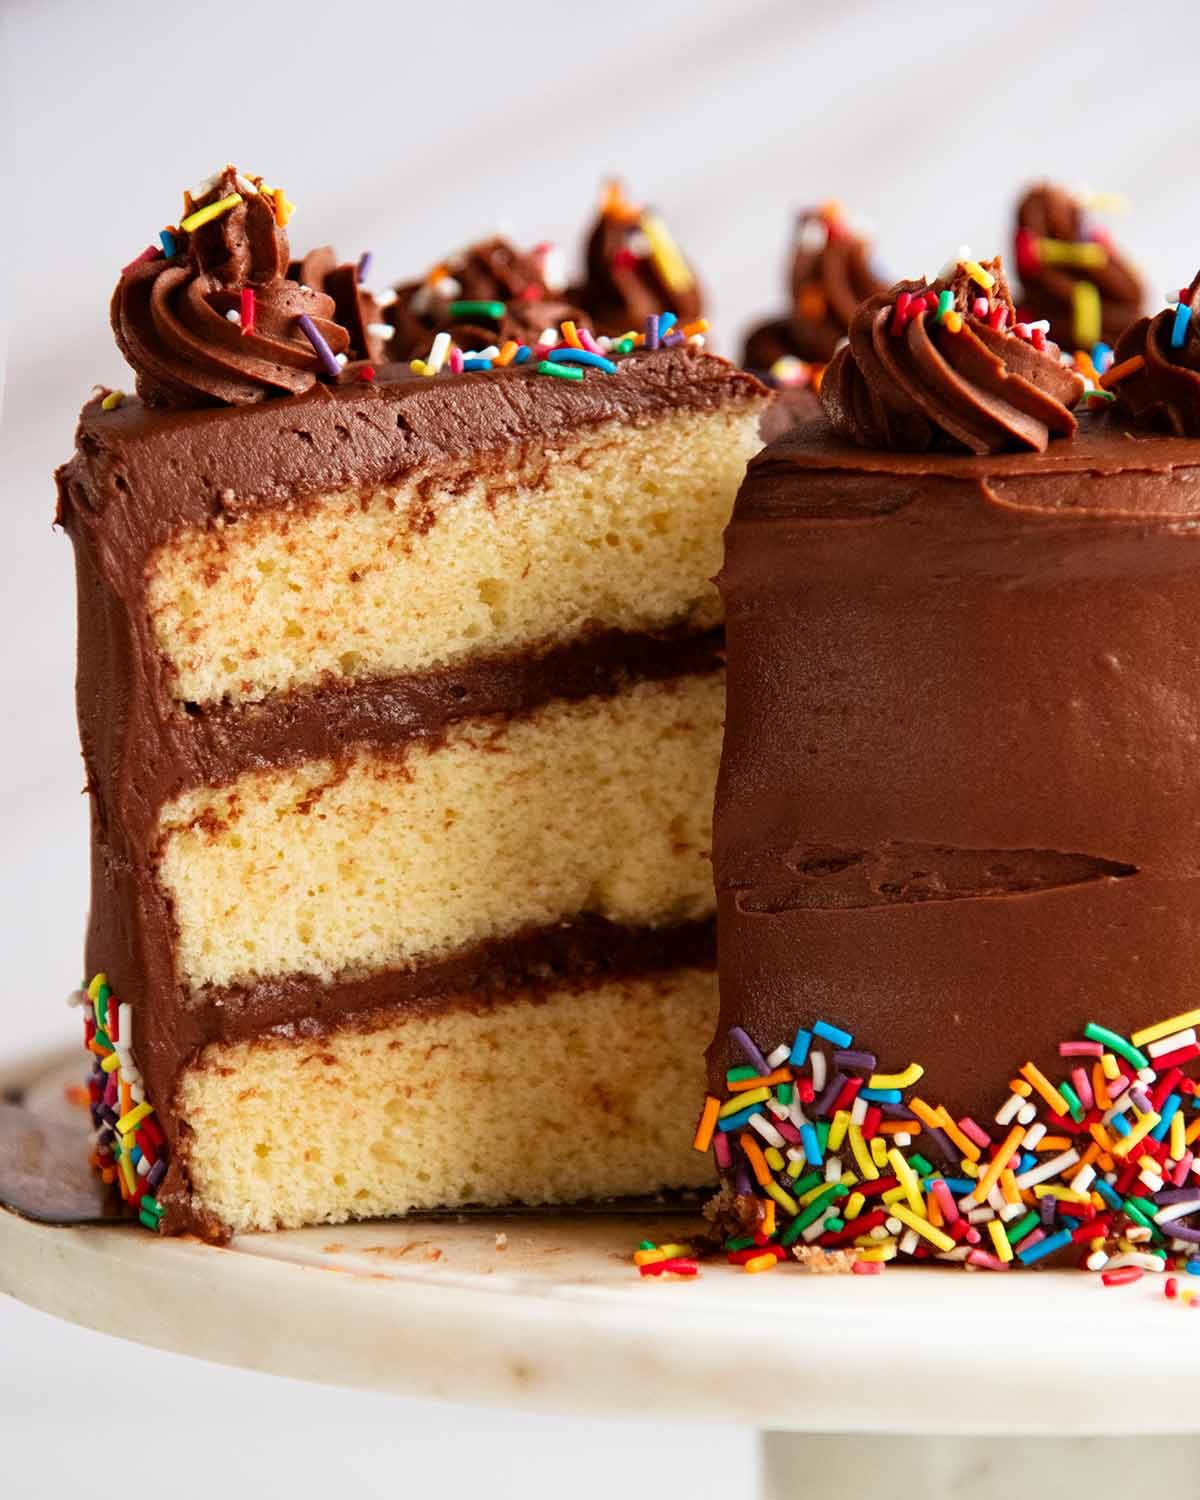
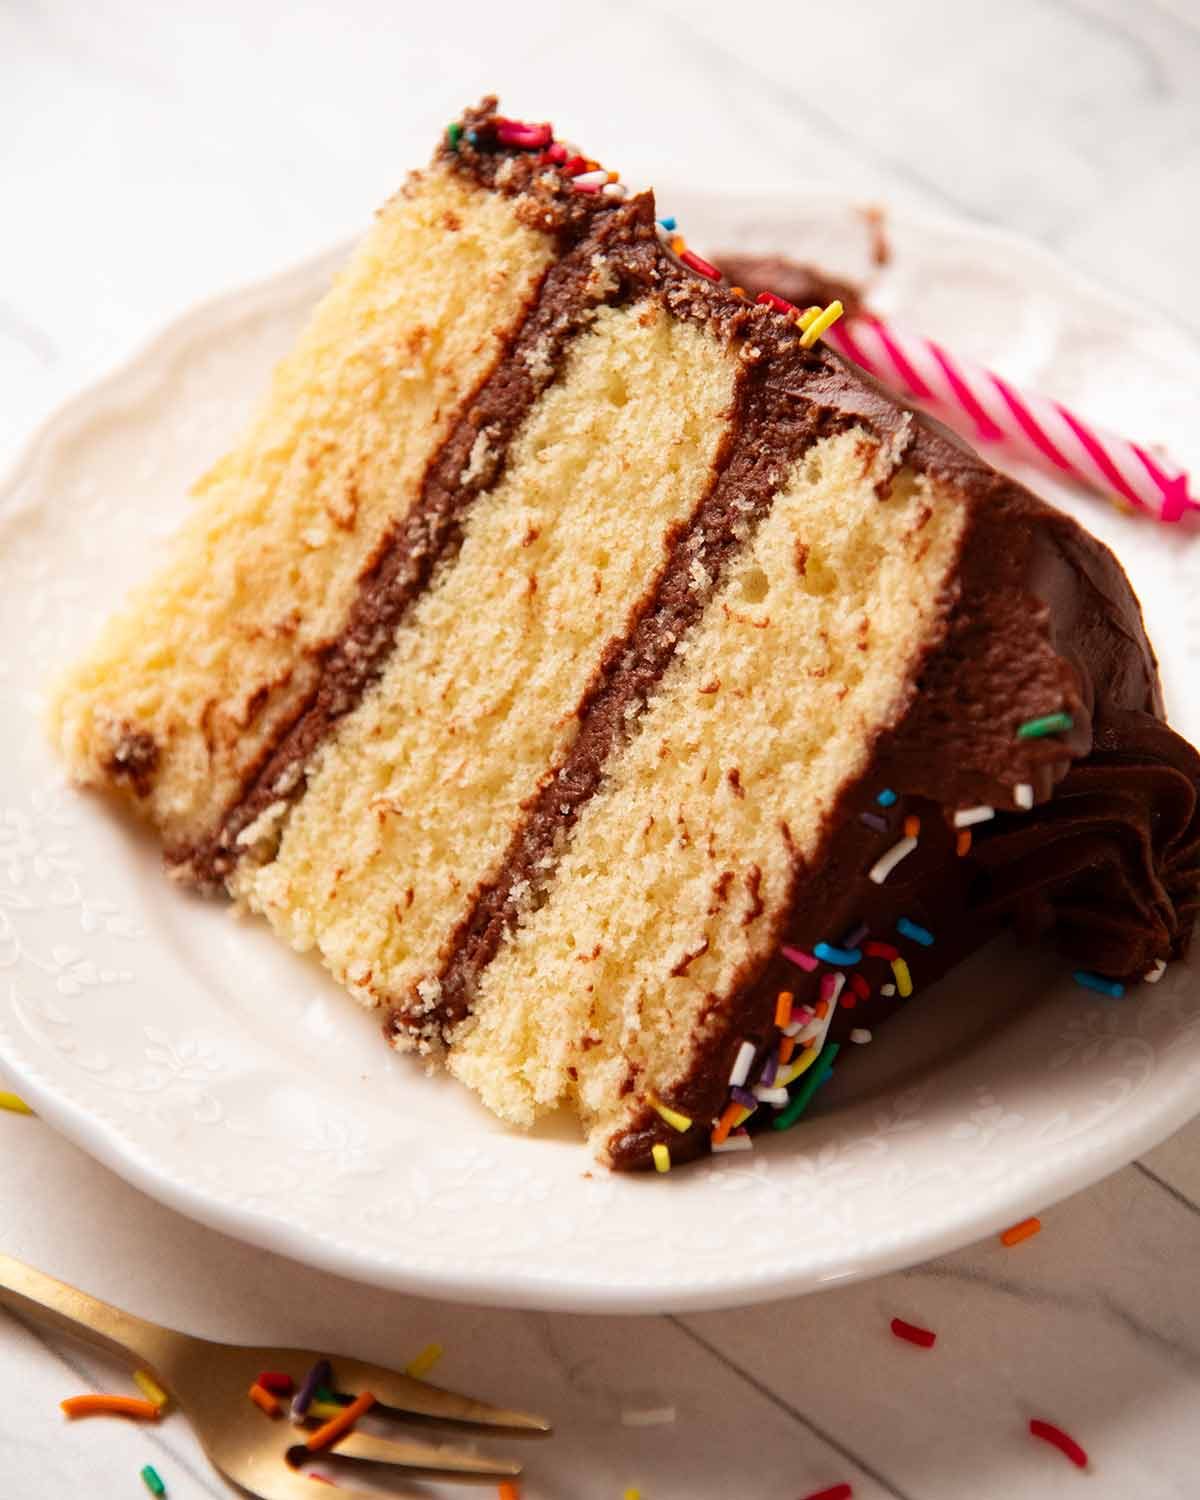
This is the birthday cake I always dreamt of having as a kid, the one the Kate Miller’s and Tina Wallace’s of the world got to have at their birthdays. I’m talking the classic yellow vanilla cake with a chocolate frosting that’s brown enough to know that it’s going to taste really chocolatey, but not so dark it veers into grown-up territory.
As for me, Mum always made her Japanese strawberry shortcake, which I absolutely love now. But as a kid, I just wanted what everyone else had – chocolate frosting and sprinkles.
Anyway, it all worked out. I grew up to be a half-decent cook, so now my birthday cake can be whatever I want. And this is it!
What the vanilla cake and chocolate frosting taste like
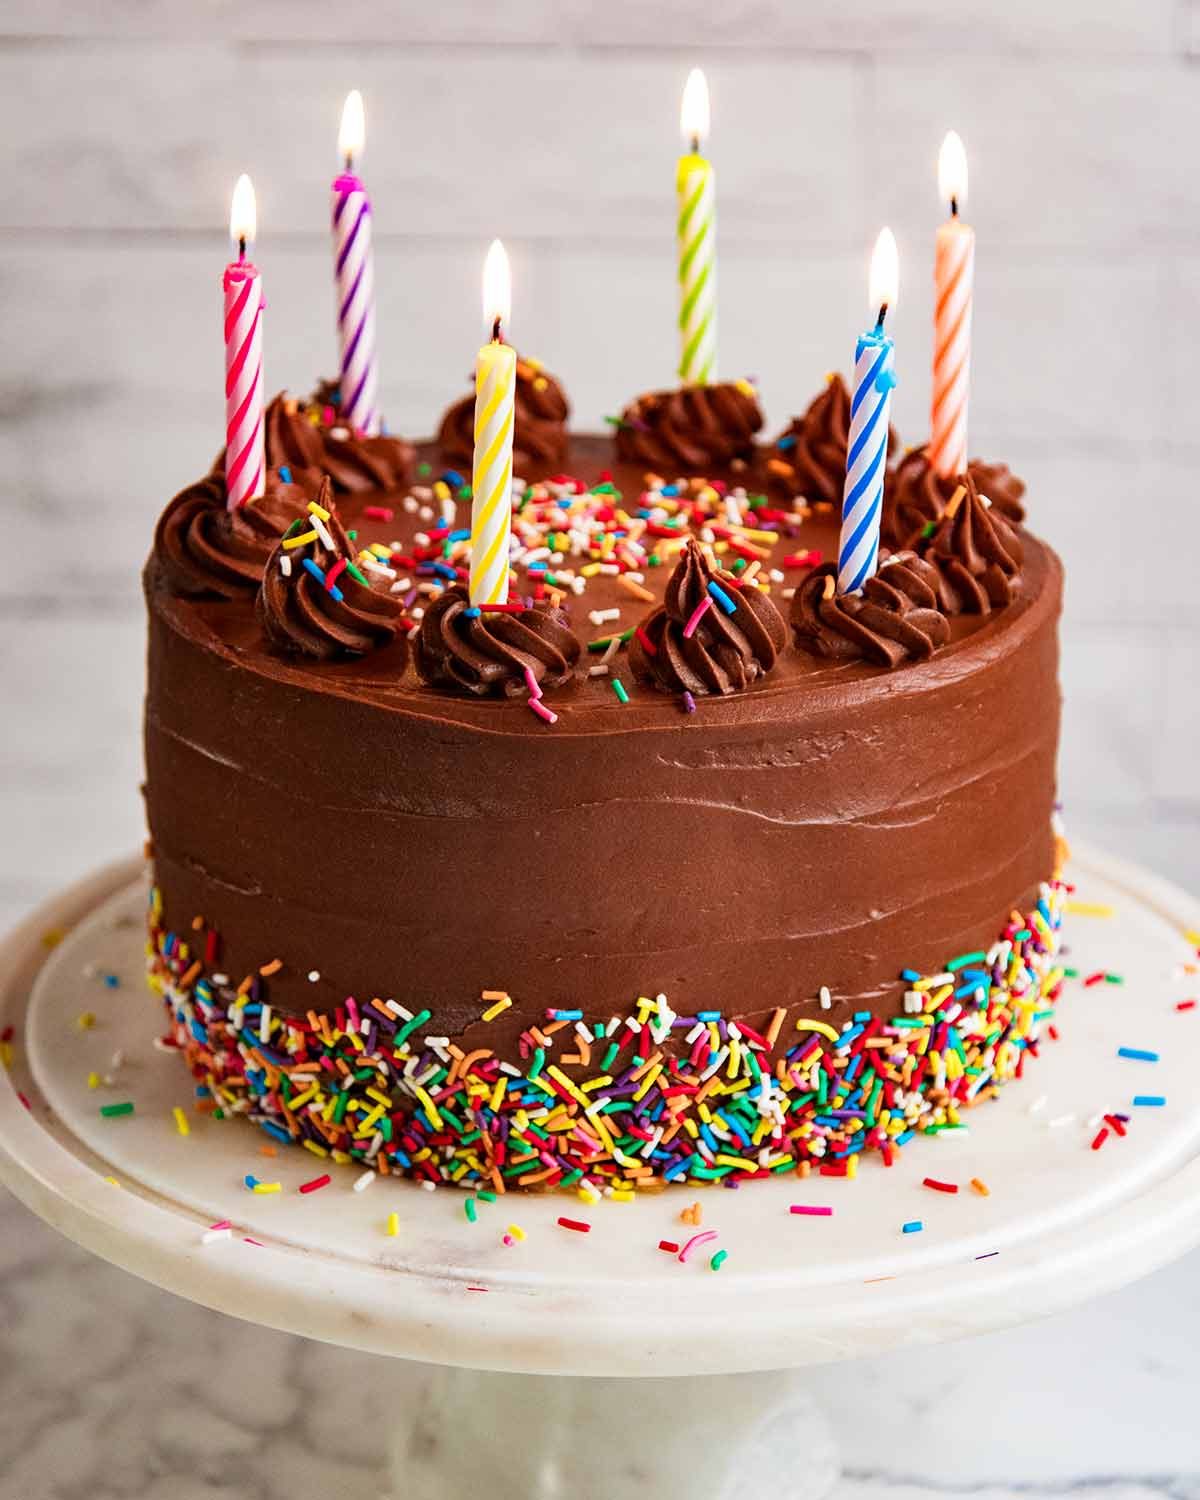
This Birthday Cake is made with three layers of my classic Vanilla Cake frosted with My Favourite Chocolate Frosting which honestly does taste like chocolate mousse. It is way less sweet and butter-dense than buttercream, so you won’t feel ill after treating yourself to a large slice of this cake. Here’s a little more about both so you can decide if this is The Birthday Cake for you too.
1. about the vanilla sponge cake
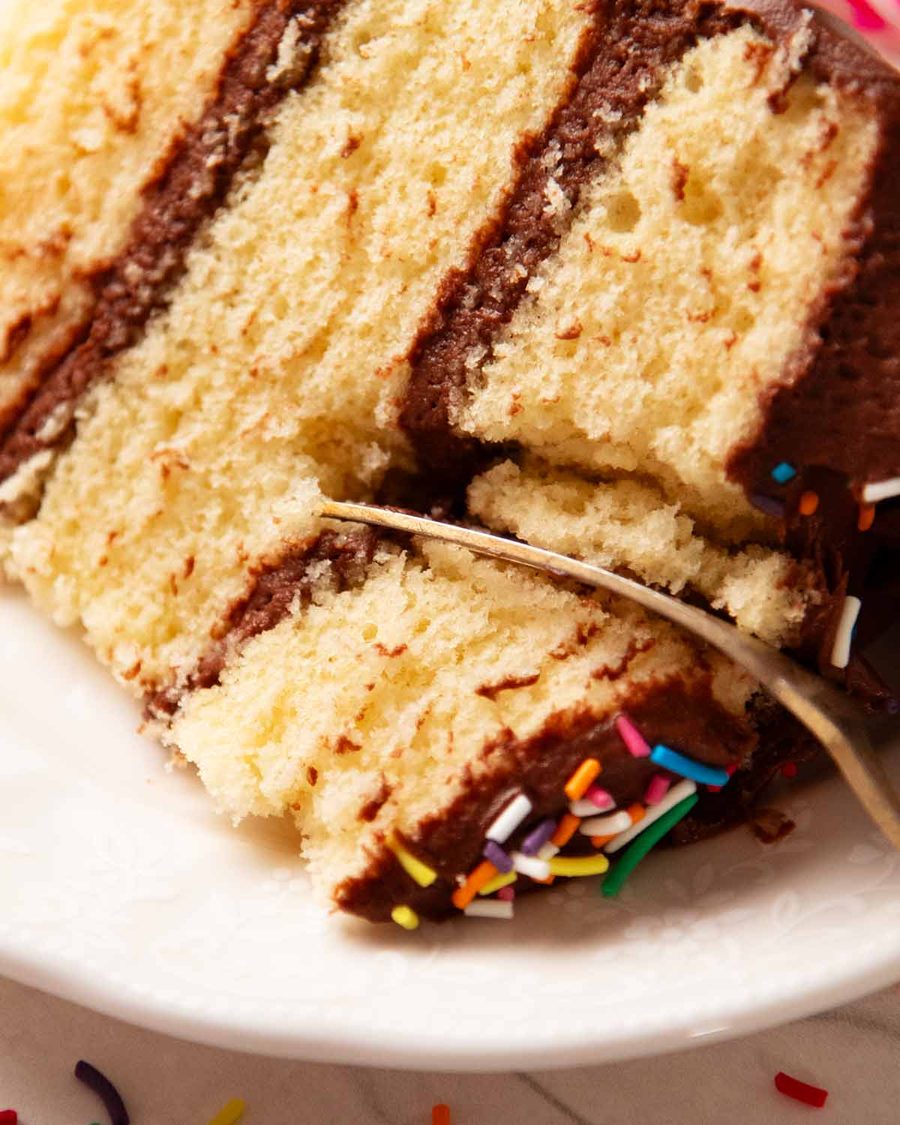
I’ve used my beloved Vanilla Cake for this Birthday Cake because it has a soft, buttery crumb that is much plusher than typical yellow cakes. The real clincher is that it stays perfectly fresh for up to 4 days, making it ideal as a make-ahead cake for occasions like birthdays, when you’ve got plenty else to juggle. Present wrapping! Party food!

2. about my favourite chocolate frosting
This is a frosting I created chasing the perfect all-rounder, and I’ve been hiding it from you for a few years (sorry!). I describe it as a cross between buttercream and whipped ganache except it’s considerably less sweet and not as rich as either of these with less than one-third the sugar and 40% less fat than the equivalent volume of buttercream.
🤓 Baking experts – it is almost a dead ringer for crèmeux or an enriched chocolate crème pâtissière (pastry cream), except this is not custard based ie. no eggs.
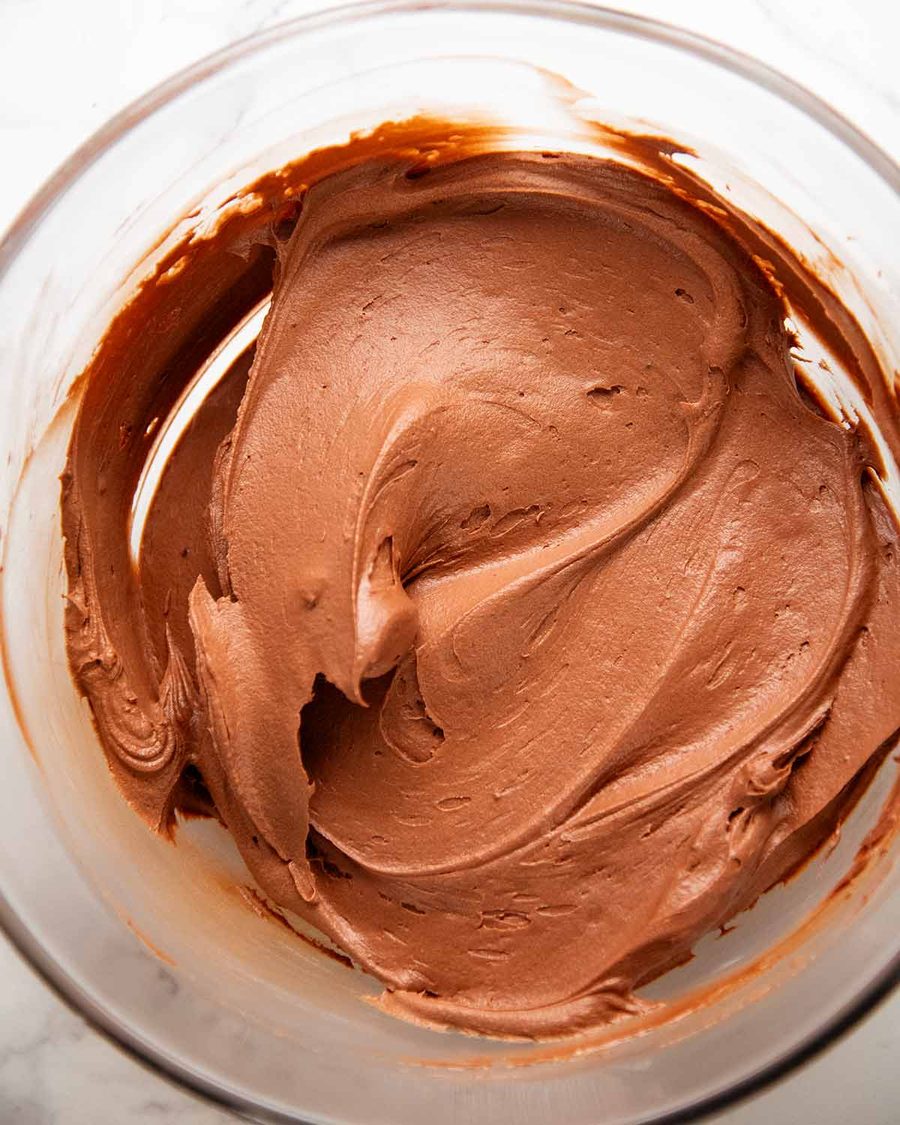
It has a texture and flavour like chocolate mousse, just a little creamier, as you’d expect from a frosting. It has terrific chocolate flavour from using both melted chocolate and cocoa, and it’s the right brown colour (seriously, it’s a thing: too light suggests lack of chocolate flavour, very dark = grown up bittersweet chocolate).
It is completely smooth, feels indulgent and rich, but in a lighter way, so even a cupcake piled high with frosting doesn’t tip into too-much territory. For context, a typical 3-layer buttercream cake can take around 500g butter and 1 kg icing sugar …….. which is exactly why I keep coming back to this frosting instead, especially for multi-layer cakes!
Ingredients for Birthday Cake
I’ve written the full recipe for both the cake and frosting in the recipe card below, but there’s also a separate post for each because I have a lot to say about both of them! Here’s the Vanilla Cake, and My Favourite Chocolate Frosting is a new post that I also published today.
1. the vanilla sponge cake
Here’s what you need to make the vanilla cake layers.

-
Plain / all purpose flour – Just regular plain flour. Not cake flour (the crumb of the cake isn’t as velvety), not self-raising flour, not gluten-free flour.
-
Fresh eggs – Whipped to aerate, these are key to make the cake extraordinarily light and fluffy. You don’t get an eggy flavour. The fresher the egg, the better it whips, the lighter the cake.
-
Baking powder – This is the leavening agent to make the cake rise. Do not substitute with baking soda (bi-carb), it doesn’t rise as well.
-
Milk, full fat – just plain cow milk. Low fat works as well but rises marginally less. Do not substitute with non dairy milk or buttermilk.
-
Sugar – It’s best to use caster / superfine sugar if you can because the finer grains dissolve better in the eggs. But regular / granulated sugar works just fine too – you may just end up with some little brown spots on the base (it’s not a big deal).
-
Oil – just 1 tablespoon adds a noticeable hint of extra moistness, especially on Day 4, without weighing down the cake in the slightest.
-
Vanilla extract – The best you can afford. Imitation will work just fine, but the flavour isn’t as pure or real. Don’t waste your money on vanilla beans or vanilla bean paste – it’s not worth it for cakes (in my opinion).
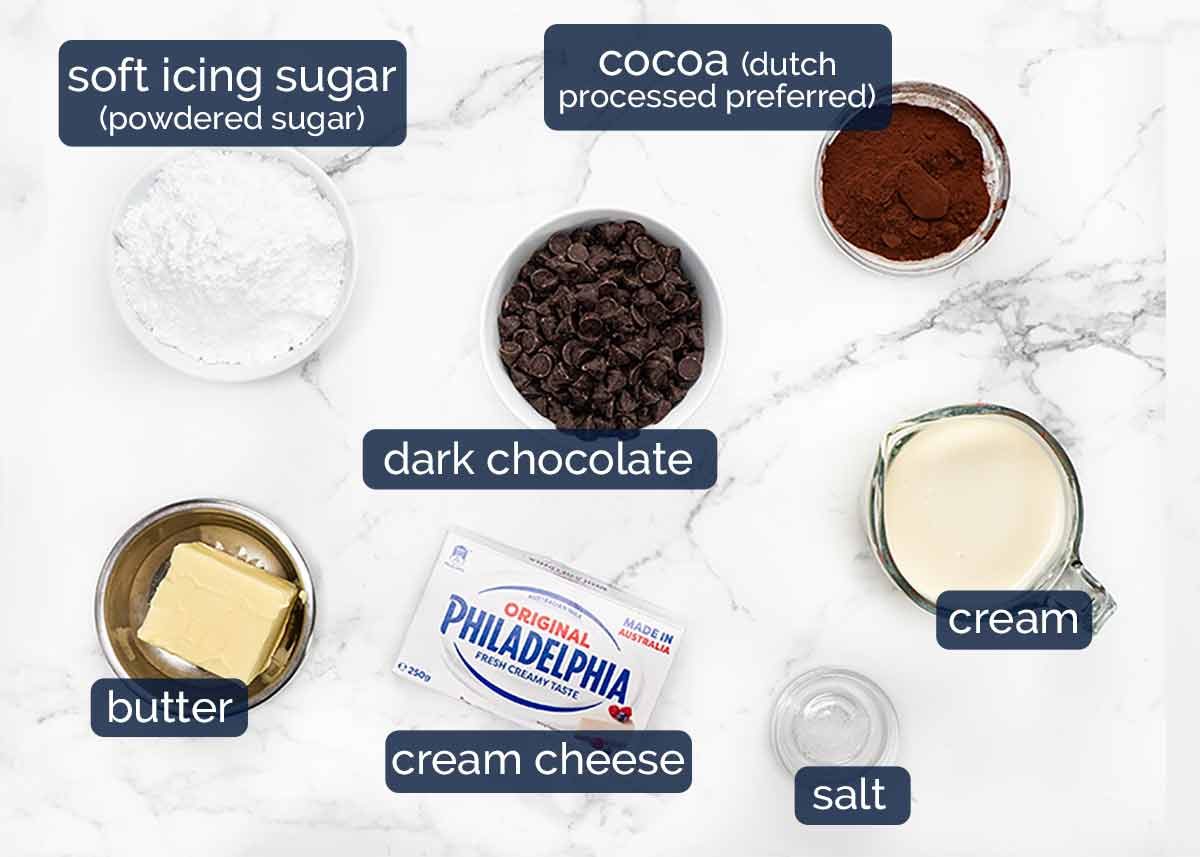
2. for my favourite chocolate frosting
The details on ingredients are an abridged version of what I’ve included in the standalone My Favourite Chocolate Frosting post. So if there’s any ingredient you’re unsure about or have more questions about, pop over to My Favourite Chocolate Frosting for more information.
-
Dark chocolate – Use dark chocolate chips or melts (buttons) from the baking aisle (US: semi-sweet chocolate chips). If using a block, chop it up into small pieces.
Other chocolate – Bittersweet/70% cocoa chocolate also works, though the frosting will be slightly darker and have a deeper chocolate flavour. Milk and white chocolate are not suitable for this frosting (they are too soft so the frosting will be looser).
-
Thickened cream / heavy cream – Use thickened cream / heavy cream or any whipping cream with 35 – 40% fat (check the label) like this Dairy Farmers one. This frosting will not work with cream less than 35% fat like low-fat cream, or cream that can’t be whipped (like dolloping cream, pouring cream). 🇦🇺 Australia – here are the thickened cream brands I use.
-
Dutch processed cocoa powder – This has a richer chocolate flavour and is darker than regular cocoa powder. It’s fine to substitute with regular unsweetened cocoa power instead. The frosting will be a little paler, but I feel like that might appeal to some people. 🙂
-
Unsalted butter – At room temperature, so it can be whipped.
-
Soft icing sugar (powdered sugar) – This is used to add a little sweetness to the frosting. 🇦🇺 Australia, use soft icing sugar, not pure icing sugar (that one’s for things like royal icing, which sets hard).
-
Cream cheese – This is used to create a volume and stability in the frosting as well as a lovely creamy texture. Unlike cream cheese frosting, this frosting does not taste tangy at all, that is not the purpose of cream cheese here.
Use block cream cheese, not the spreadable kind that comes in tubs (it’s too soft). If spreadable is all you can get, just be aware that the frosting will be a little softer so while fine for spreading, it’s not as stable for piping tall swirls. You can thicken the frosting using extra icing sugar – just beat it in at the end.

How to make this Birthday Cake
Make the cake first. Then by the time they have fully cooled, the frosting will also be ready. From start to finish, including cooling time, this will take 3 1/2 hours to make (active time around 1 hour, give or take depending on how fast you can frost cake!).
1. to make the vanilla cake
Once you start making the cake batter, don’t stop until it’s in the oven else the delicate egg bubbles will deflate and your cake won’t rise as well as it should.
-
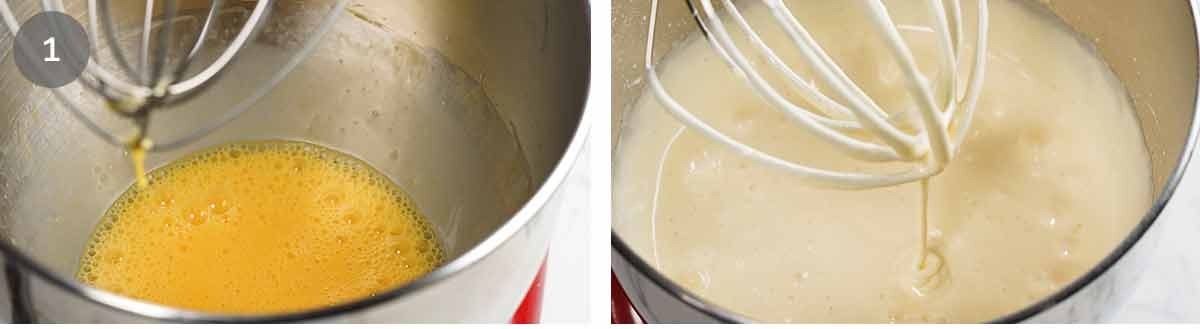
Whip the eggs and sugar – Beat the eggs with sugar for a whole 7 minutes until thick and glossy, it changes from yellow to white, and tripled in volume (just over double depth in the bowl). The aeration created during this step is key for a soft, fluffy crumb.
-
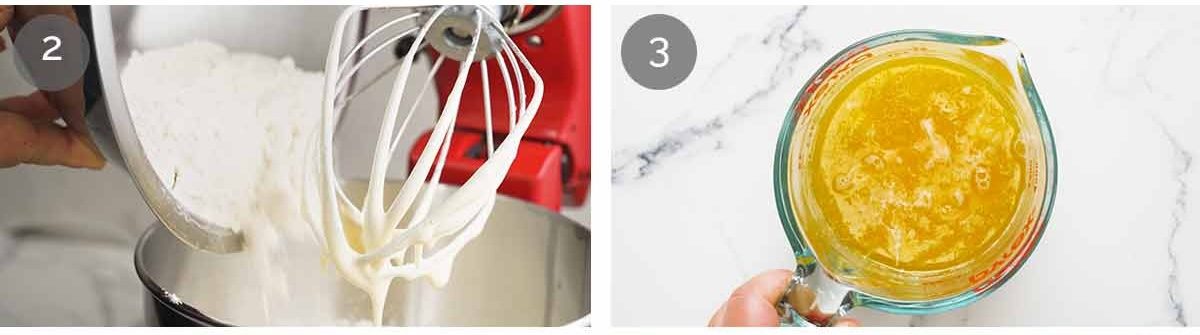
Gradually add flour – Whisk together the flour, baking powder and salt. Then add into egg mixture in 3 goes, mixing for just 5 seconds on Speed 1 in between. This should make the flour just incorporated – don’t worry if there are some bits not mixed in.
-
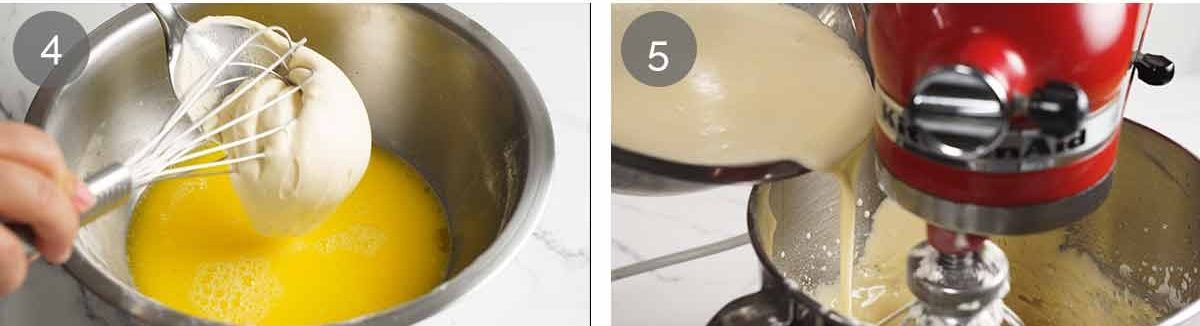
Hot melted butter in milk – Use a microwave or stove to heat milk with the butter until it melts. Do this during step 1.
-
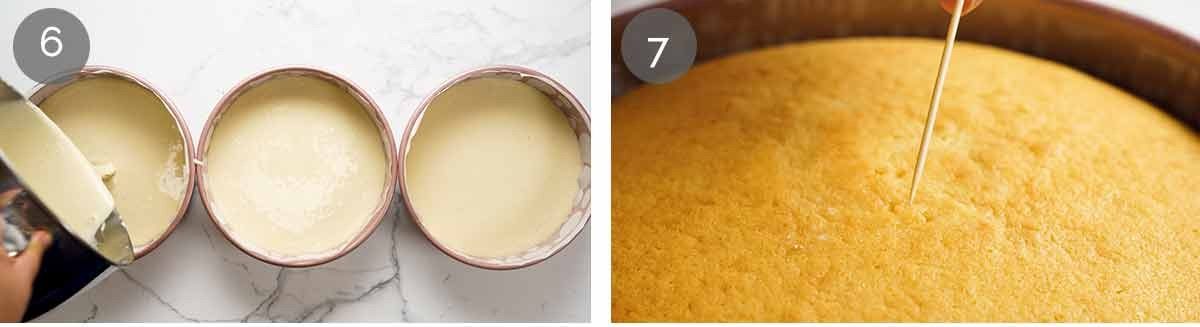
Mix some batter into hot milk – Pour the hot milk into a bowl and also add the oil and vanilla (I use the used flour bowl). Then whisk about 1 1/2 cups of the cake batter from Step 2 into the hot milk, whisking well until fully combined. This makes it easier for the hot milk to blend into the batter which helps preserve the bubbles in the batter.
ℹ️ We are also tempering the hot milk so it doesn’t cook the egg in the cake batter (tempering = bringing two mixtures to a similar temperature so they combine smoothly without scrambling the eggs).
-
Slowly pour milk mixture into the cake batter over 20 seconds on Speed 1. Scrape down sides of bowls, then mix for 10 seconds on Speed 1 – the batter should now be smooth.
-
Pour into 3 x 20cm / 8″ cake pans lined with parchment/baking paper. 23cm/9″ pans will also work, the layers will just be 25% thinner.
-
Bake for 22 minutes at 180°C/350°F (160°C fan-forced), or until a toothpick inserted into the centre comes out clean.
-
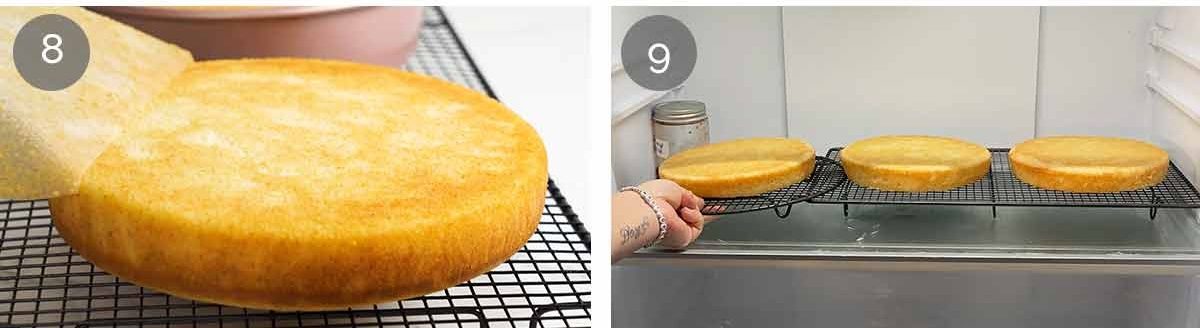
COOL upside down for level cakes (so you have neat, straight layers in a layer cake) on a cooling rack.
-
Fridge 30 minutes – Then cool in the fridge for at least 30 minutes before frosting. Cold cakes are firmer which makes them much easier to handle and frost cleanly without tearing or shedding crumbs.
2. to make MY FAVOURITE chocolate frosting
This is essentially made like ganache, with cocoa added for a chocolate flavour boost, then whipped with cream cheese to make it fluffy and creamy.
-
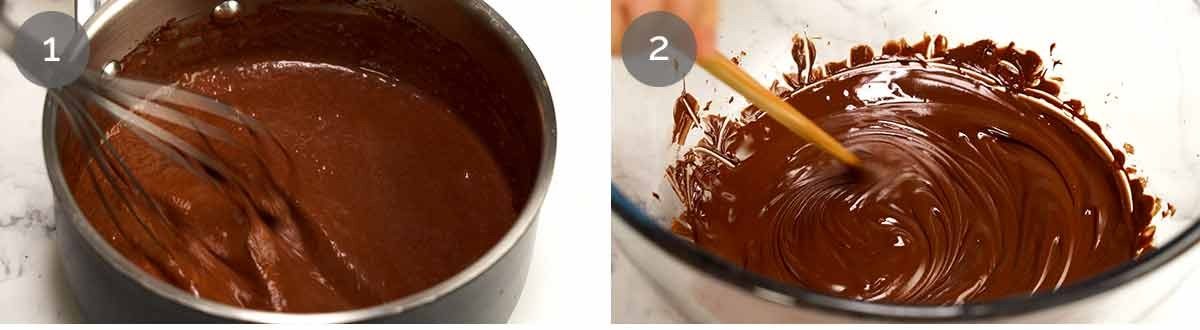
Bloom cocoa by mixing hot cream with the cocoa and setting aside for 5 minutes. The cocoa fully hydrates, deepening the chocolate flavour and smoothing out any graininess for a richer, more rounded taste.
-
Melt chocolate – Place the chocolate chips in a heatproof bowl and melt in the microwave in bursts until smooth – 30 seconds on high, stir, then 20 second increments.
-
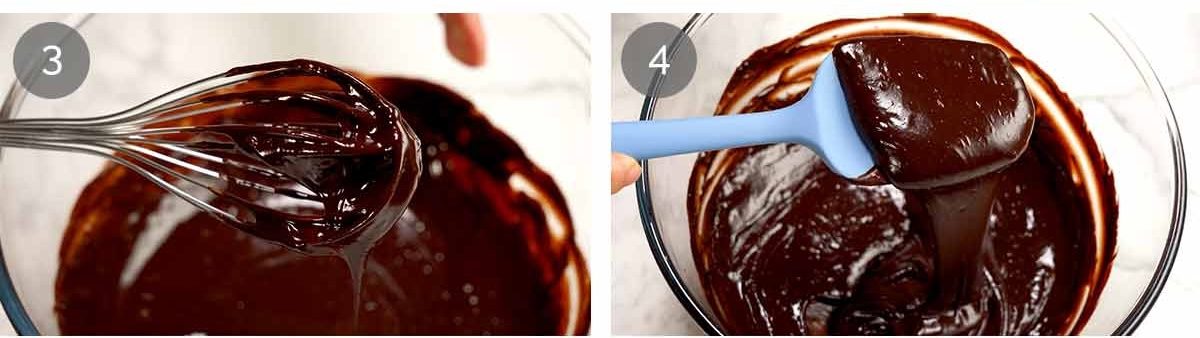
Chocolate paste – Whisk the bloomed cocoa into the melted chocolate until it’s lump free.
-
Cool for 15 minutes on the counter – it will thicken. Don’t worry if a skin forms on the surface, it will beat out in the next step.
-
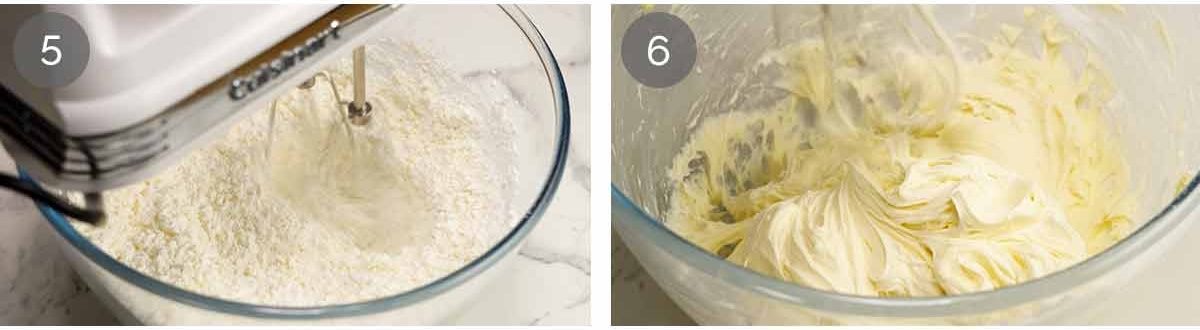
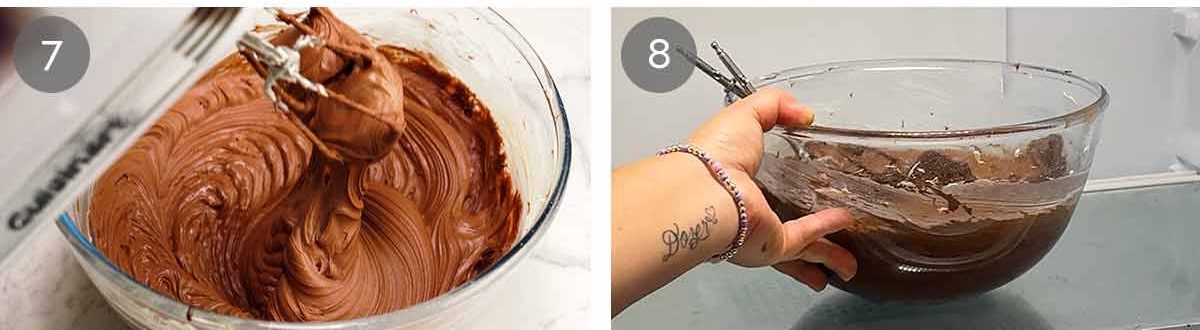
Cream butter – In a separate large bowl, beat butter with a handheld mixer until soft and fluffy (about 1 1/2 minutes on high), then beat in the icing sugar. It will become sandy because of the small amount of butter we’re using. Beat it until there are no large lumps of butter (~ 30 seconds).
-
Cream cheese whip – Then add the cream cheese and beat until the sandy bits incorporate into the cream cheese and becomes a smooth mixture, about ~30 seconds on high. Stop beating once the mixture is smooth, don’t try to aerate at this stage (the cream cheese gets loose).
-
Beat in chocolate – Add all the cooled chocolate paste and beat until combined.
-
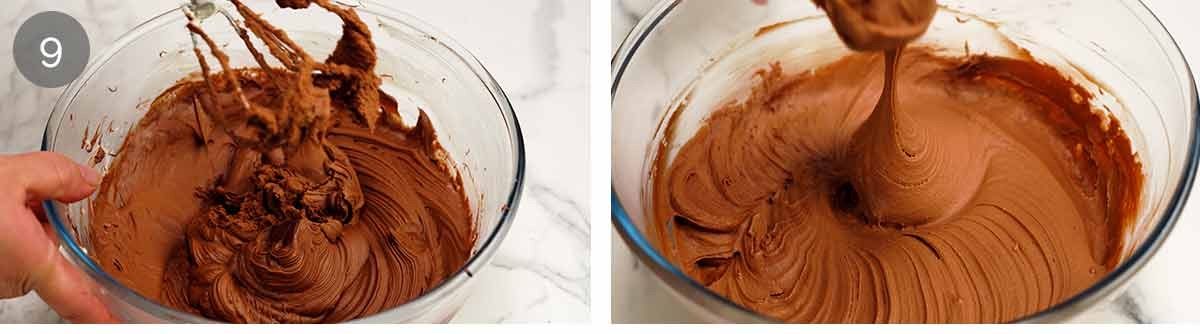
Refrigerate 2 hours – Cover the bowl with cling wrap and refrigerate for 2 hours until properly fridge-cold (stick the beaters in the bowl). You can leave it in the fridge at this point for as long as you want, limited only by the expiration date of your cream.
-
Fluff frosting – Remove bowl from the fridge. The mixture should be fully cold and quite firm. Pour in the cold cream – this extra bit of cream helps aerate the frosting to create volume. Then beat on high for 1 1/2 minutes or until you have stiff peaks (ie upright Santa hats, not floppy elf hat). The frosting should be beautifully creamy like buttercream but also fluffy like whipped cream – better taste test to check!
Note: The colour will be paler than the final colour after the frosting sets – it darkens by a few shades.
3. frosting
The recipe makes enough frosting to sandwich between the layers, frost the top and sides, plus leftover to pipe some decorations.
The vanilla cake recipe I use bakes up almost perfectly level, so there’s usually no need to trim. But if you end up with a slight dome and want perfectly even layers, go ahead and trim it.
-
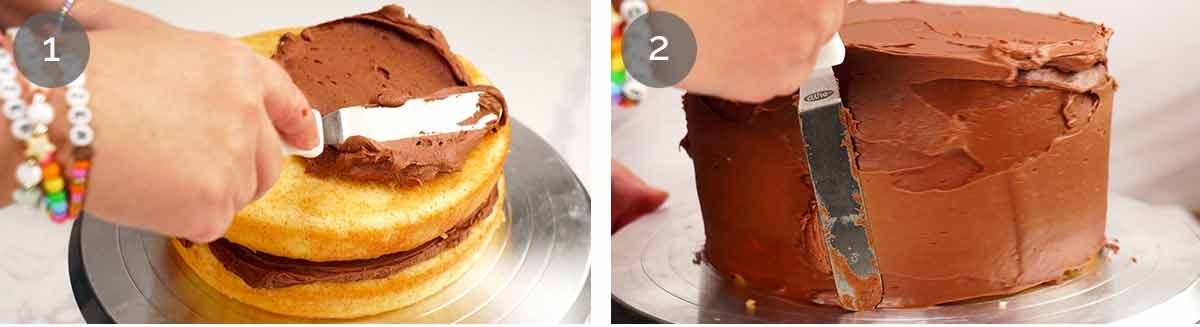
Sandwich layers – Place a cake layer upside down on a serving platter or cake turntable (upside down = flat surface). Spread with just shy of 1 cup of frosting. Cover with another cake layer upside down, spread with another 1 cup of frosting, then place the final cake layer on, also upside down.
-
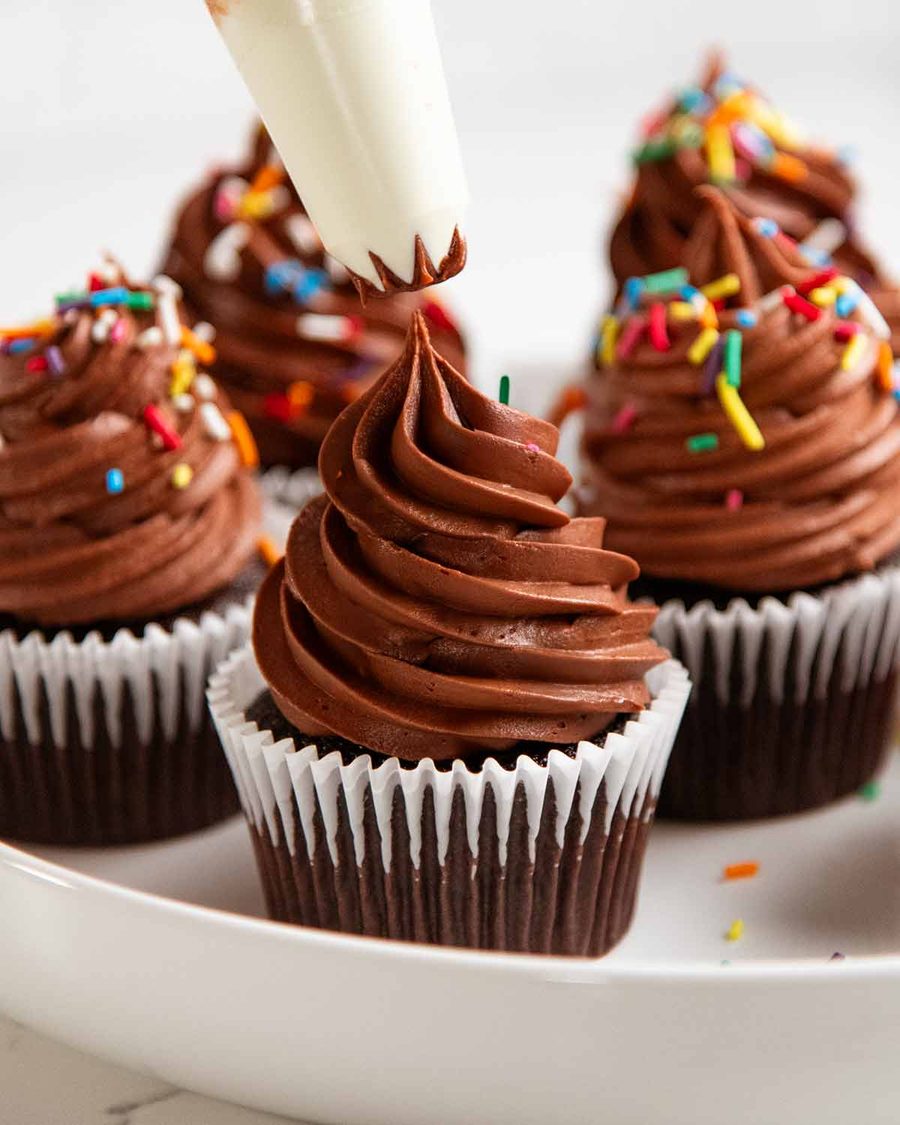
Sides and top – Transfer about 1 cup of frosting to a piping bag, then use the rest to frost the top and sides.
-
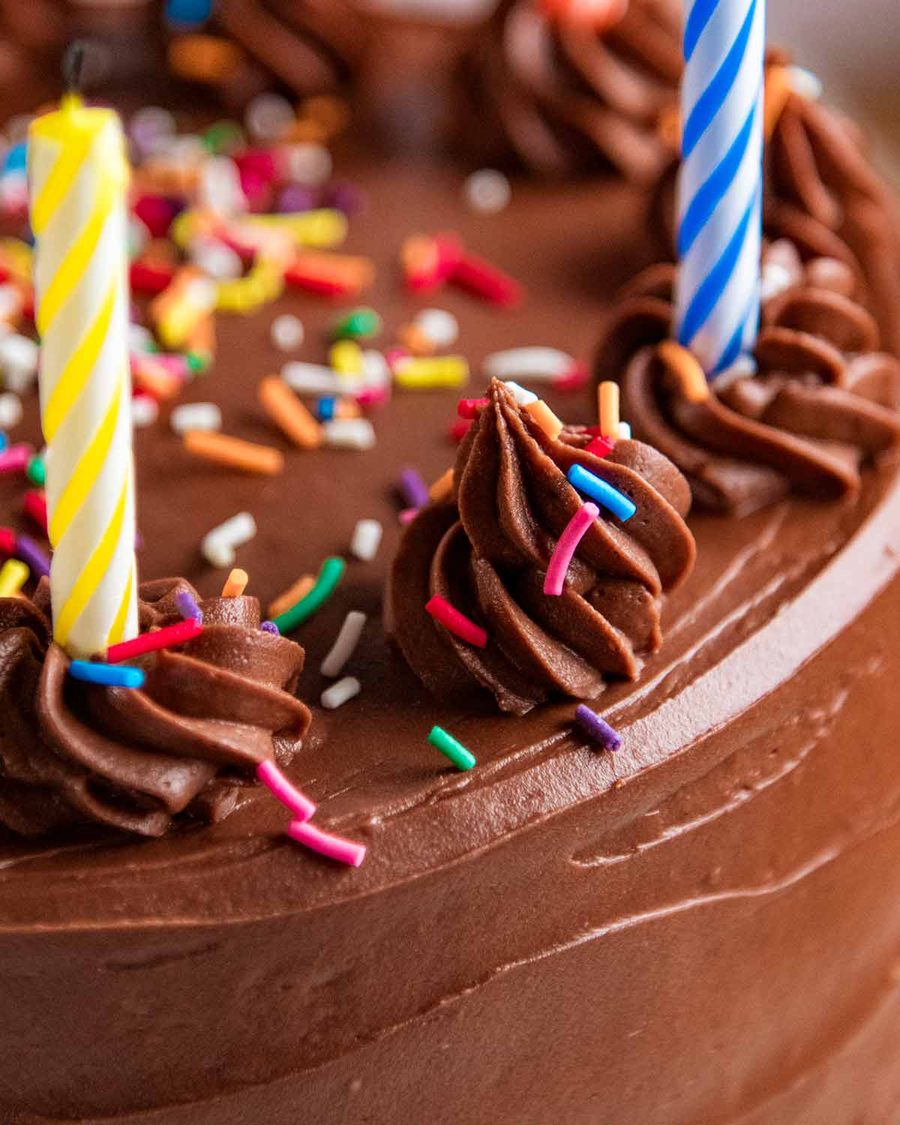
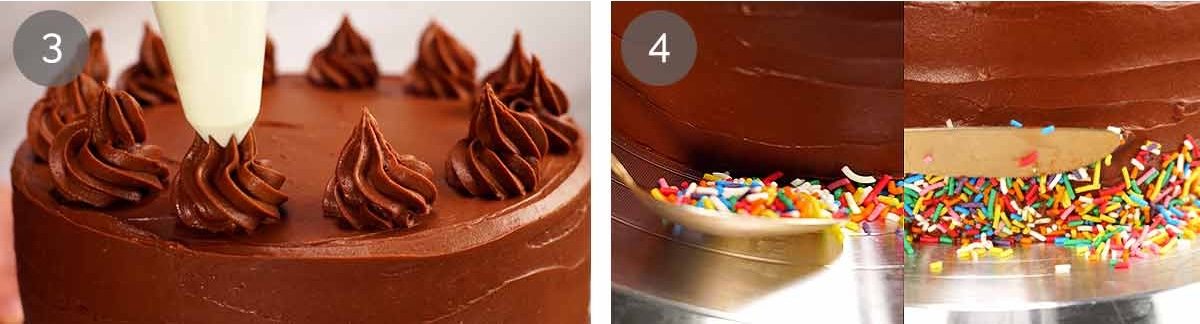
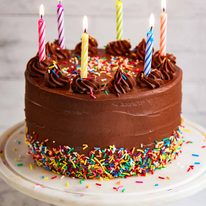
Pipe decorative swirls on the surface using a star-tip nozzle.
-
Sprinkles, sprinkles, sprinkles! What is a birthday without sprinkles?? 🎉
So there you have it. The Birthday Cake I dreamed of having as a kid, and as an adult it feels nostalgic and familiar, but special enough to make whoever it’s for feel like the centre of the world. The vanilla cake layers really are special in their own right, and when you put it together with that dreamy chocolate frosting, it is just absolutely heavenly!
But, enough about my dream birthday cake. Tell me what cake feels like a birthday to you! Share, share, everyone wants to know! – Nagi x
PS If you prefer chocolate rather than vanilla cake, use this recipe. 🙂
Birthday Cake FAQ
It will keep like freshly made for 4 days in the fridge – the vanilla cake has an outstanding shelf life. Even at the 7 day mark it is only just started to lose freshness! It’s quite extraordinary. It’s also worth noting that the frosting does not go hard in the fridge like buttercream does – so you don’t need to wait for the frosting to thaw before serving.
The cake once frosted is not suitable for freezing but the cake layers can be frozen for 3 months.
The frosting can if you ensure all the ingredients are gluten-free (they should be). However, the cake isn’t suitable for converting into gluten-free.
Just use my Chocolate Cake recipe and bake in 3 pans!
Watch how to make it
Hungry for more? Subscribe to my newsletter and follow along on Facebook, Pinterest and Instagram for all of the latest updates.
Birthday Cake
Prep: 35 minutes
Cook: 22 minutes
Cooling frosting and cake: 2 hours 30 minutes
Cakes
Western
Servings12 – 16
Tap or hover to scale
Ingredients
My Favourite Chocolate Frosting
Prevent screen from sleeping
Instructions
ABBREVIATED
-
Vanilla cake – Beat eggs and sugar until triple in volume, fold in flour. Whisk hot milk + butter + oil + vanilla, temper with bit of batter, then slowly beat into cake batter. Bake in 3 pans for 23 minutes, cool inverted then frost.
-
My Favourite Chocolate Frosting – Bloom cocoa, mix into melted chocolate. Cream butter, beat in icing sugar, then cream cheese and chocolate mixture. Fridge 2 hours. Whip with cream. Use immediately.
FULL RECIPE
-
Preheat oven to 180°C/350°F (160°C fan) for 20 minutes before starting the batter (Note 11). Place shelf in the middle of the oven.
-
Pans – Grease 3 x 20cm / 8” cake pans with butter, then line with parchment / baking paper. Best to use cake pan without a loose base, if you can, as the batter is quite thin. (Note 12)
-
Dry ingredients – Whisk flour, baking powder and salt in a large bowl. Set aside.
-
Beat eggs until triple – Beat eggs for 30 seconds on speed 6 of a Stand Mixer fitted with a whisk attachment, or hand beater. With the beater still going, pour in the sugar over 45 seconds, then beat on speed 8 for 7 minutes until the eggs triple in volume and become white.
-
Heat Milk-Butter – While egg is beating, place butter and milk in a heatproof jug and microwave 2 minutes on high until the milk is hot and butter is melted (or use stove). Don’t let the milk boil over.
-
Add flour in 3 batches – When the egg is whipped, add the flour in 3 batches beating for 5 seconds on Speed 1 in between. Once all the flour is in, beat for another 5 – 10 seconds until you can’t see any flour, then stop beating straight away.
-
Combine milk, vanilla & oil with batter – Pour hot milk, vanilla and oil into the now empty flour bowl. Add about 1 1/2 cups of cake batter into the hot milk bowl (no need to be 100% accurate with amount). Whisk vigorously using a handheld whisk until smooth and a bit foamy.
-
Slowly beat in milk – Turn beater back on Speed 1 then pour the Milk mixture into the cake batter over 15 seconds, then turn beater off.
-
Scrape and final mix – Scrape down sides and base of bowl. Beat on Speed 1 for 10 seconds – batter should now be smooth and pourable.
Bake:
-
Divide batter between three pans (370g / 13 oz batter per pan). Bang each cake pan on the counter 3 times to knock out big bubbles (Note 13).
-
Bake 23 minutes or until golden and toothpick inserted into centre comes out clean.
Cool & frost:
-
Cool – Remove pans from oven. Cool in cake pans for 15 minutes, then gently turn out onto cooling racks. Cool upside down – slight dome will flatten perfectly. Level cake = neat layers.
-
Refrigerate – Once fully cool on the counter, refrigerate for 30 minutes before frosting (makes it easier to frost as cake is firmer when cold).
-
Frost – Use the cake layers upside for flat surfaces. Spread 1 cup Chocolate Frosting on each layer, then frost the sides and surface generously. Use leftover frosting to pipe decorative swirls on the top.
-
Sprinkle! Decorate with sprinkles as desired. How I decorate the base – place sprinkles around the base, then use a butter knife to scoop them up and press onto the sides. See video for visual demo.
Chocolate Frosting:
-
Bloom cocoa – Heat the cream in a heatproof bowl until hot but make sure it doesn’t come to a boil. Add cocoa powder and whisk until lump free – it will be like a thin paste. Set aside 5 minutes to bloom (brings out chocolate flavour).
-
Melt chocolate – Place the chocolate chips in a heatproof bowl and melt in the microwave in bursts until smooth – 30 seconds on high, stir, then 20 second increments.
-
Chocolate paste – Add the cocoa paste into the melted chocolate. Whisk until combined and smooth, it will be like a thin paste. Cool for 15 minutes on the counter – it will thicken. Don’t worry if a skin forms on the surface, it will beat out in the next step.
-
Cream cheese whip – In a separate large bowl, beat butter with a handheld mixer until soft and fluffy (about 1 1/2 minutes on high). Add icing sugar and beat until sandy and no large butter lumps remain (~ 30 seconds). Add cream cheese and beat until smooth and creamy (~30 seconds), stopping once no yellow butter bits remain.
-
Beat in chocolate – Add all the chocolate paste and beat until combined. Taste. Yum!
-
Refrigerate – Cover the bowl with cling wrap and refrigerate for 2 hours until properly fridge-cold (stick the beaters in the bowl). You can leave it in the fridge at this point for days.
-
Fluff frosting – Remove bowl from the fridge. Add the 1/2 cup of cream and salt. Beat on high for 1 1/2 minutes or until you have stiff peaks (ie upright Santa hats, not floppy elf hat). The frosting should be beautifully creamy like buttercream but fluffy like whipped cream. Use immediately (see My Favourite Chocolate Frosting full recipe for notes on keeping, shelf life, etc)
Recipe Notes:
- Read recipe from start to finish before starting;
- Make sure your baking powder is not past its expiry – here’s how to check;
- Fresh eggs make the cake rise properly (old eggs don’t aerate as well);
- Work in order of steps per recipe;
- Don’t incorporate add-ins like funfetti or blueberry (they sink); and
- Once you start, keep going until it’s in the oven. Do not at any point leave batter sitting around – bubbles will subside!
Stand Mixer speeds are for a Kitchen Aid which has 10 speed settings. Hand beater works for same times and speeds (though not as powerful, I have found that the ability to move around bowl makes it just as effective).
RECIPE NOTES
1. Cake flour works just fine with this recipe, but it’s marginally better using plain / all-purpose flour (flavour, softness, shelf-life).
2. Caster / superfine sugar is my default for baking as the finer grains dissolve more easily. However, regular white sugar (granulated sugar) will work just fine with this recipe.
3. Eggs – important to be at room temp as they fluff better when whipped which is key to the fluffy texture of this cake. Also, fresher eggs aerate better = better rise. Old eggs don’t fluff as well.
Quick way to warm up fridge cold eggs – place in a large bowl, cover with warm tap water (just warm, not hot), leave for 5 minutes. Wipe dry (to avoid residual water dripping into bowl), then use per recipe.
Large eggs – 50 – 55g / 2 oz per egg this is the industry standard of egg sizes sold in cartons labelled as “large eggs” in Australia and the US. See here for what to do if your eggs are much larger/smaller.
4. Baking powder – dead baking powder is a common problem with cake fails, even if not past the expiry date. Here’s how to check yours is still good.
Baking soda (bi-carb) won’t make the cake rise quite as well. If you have no choice, then use 3/4 teaspoons of baking soda.
5. Milk – if you sub with lower fat milk then the texture of the crumb becomes a little less tender. Do not substitute with non-dairy milk, such as soy or almond milk.
6. Oil – just 3 teaspoons makes a noticeable difference to the tenderness of the crumb AND keeps the crumb moist for days.
7. Dark chocolate – called semi-sweet chocolate in the US – any chocolate with ~45 – 55% cocoa. Make sure you use chocolate from the baking aisle, not confectionary aisle (only exception is Lindt blocks). Use chips or melts/discs for convenience, or chop up a block.
Bittersweet/70% also works, giving a deeper colour and slightly firmer frosting. Milk and white chocolate are too soft, the frosting will be too loose.
8. Cream needs to be 35% fat minimum in order for frosting to thicken as intended. The frosting will be looser if you use a lower fat cream – still spreadable but not pipe-able.
9. Dutch processed cocoa is darker and more intense than regular cocoa. Using regular will give a lighter colour and slightly less depth, but still great, no need to go out of your way for Dutch.
10. Cream cheese – I use Philadelphia, which is firm but softer than some brands. Firmer cream cheese (like Coles brand 🇦🇺) will give you a slightly more stable frosting, still super creamy, so not a bad thing at all – it’s actually better if you’re wanting to pipe very tall swirls on cupcakes. Tub cream cheese is more spreadable, so the frosting will be softer, fine for spreading and sandwiching, but not ideal for piping.
11. Oven preheating – 30 minutes preheat is recommended to ensure no loss of heat when the oven door is opened. Never use the rapid heat function on your oven for baking, no matter how fancy your oven is!
12. Cake pans – the batter is quite thin so to ensure no leakage, best not to use a cake pan with a loose base or a springform pan. If that’s all you’ve got, then use butter to firmly fill the gap (this should be enough – I had no leakage when I did this) and for extra insurance, try to cut the paper for the base slightly larger so it goes slightly up the wall.
13. Knock out big bubbles – banging cake pans on counter will knock out big air bubbles in the batter that causes unsightly irregular holes in the crumb. It does not burst the tiny bubbles that make the cake rise – they are too small to bang out!
11. Sweetness note – sweeter than Asian cakes, less sweet than typical Western butter cakes. Please do not reduce sugar – 1 1/2 cups is minimum required to make the eggs foamy enough to rise.
12. Different measures in different countries – tablespoon and cup sizes differ slightly from country to country. In most recipes, the difference is not enough to affect the outcome of the recipe, but for baking recipes, you do need to be careful. I’ve tested this recipe using both US and Australian cups (the two countries with the greatest size variance) and the cakes were exactly the same. So you can have confidence that this recipe can be used no matter which country you are in – only exception is Japan (cup sizes are considerably smaller (200ml) so please use weights provided).
For absolutely certainty, opt to use the weights provided (click Metric toggle button above ingredients). Professional kitchens only use weights.
13. Storage – Cakes can be kept in an airtight container or individual wrapped for 4 days in the fridge (or pantry, if it’s cool), it has an excellent shelf life. Still great even on day 7. Freezer 3 months, unfrosted. Frosting can be made the day before then refrigerated, give it a quick whip then use per recipe. Once frosted, store in the fridge. Cakes are always best served at room temperature, but this frosting stays creamy even when refrigerated.
Nutrition Information:
Calories: 339cal (17%)Carbohydrates: 51g (17%)Protein: 6g (12%)Fat: 13g (20%)Saturated Fat: 7g (44%)Cholesterol: 91mg (30%)Sodium: 97mg (4%)Potassium: 190mg (5%)Fiber: 1g (4%)Sugar: 31g (34%)Vitamin A: 434IU (9%)Calcium: 90mg (9%)Iron: 2mg (11%)
Remembering Dozer
Dozer’s birthday is this weekend, and today’s cake is dedicated to him! He always did take his birthdays seriously. Not in a “grateful for another year” kind of way, more in a “where is my cake” kind of way. In the early days, his cakes were….humble, shall we say? 😅
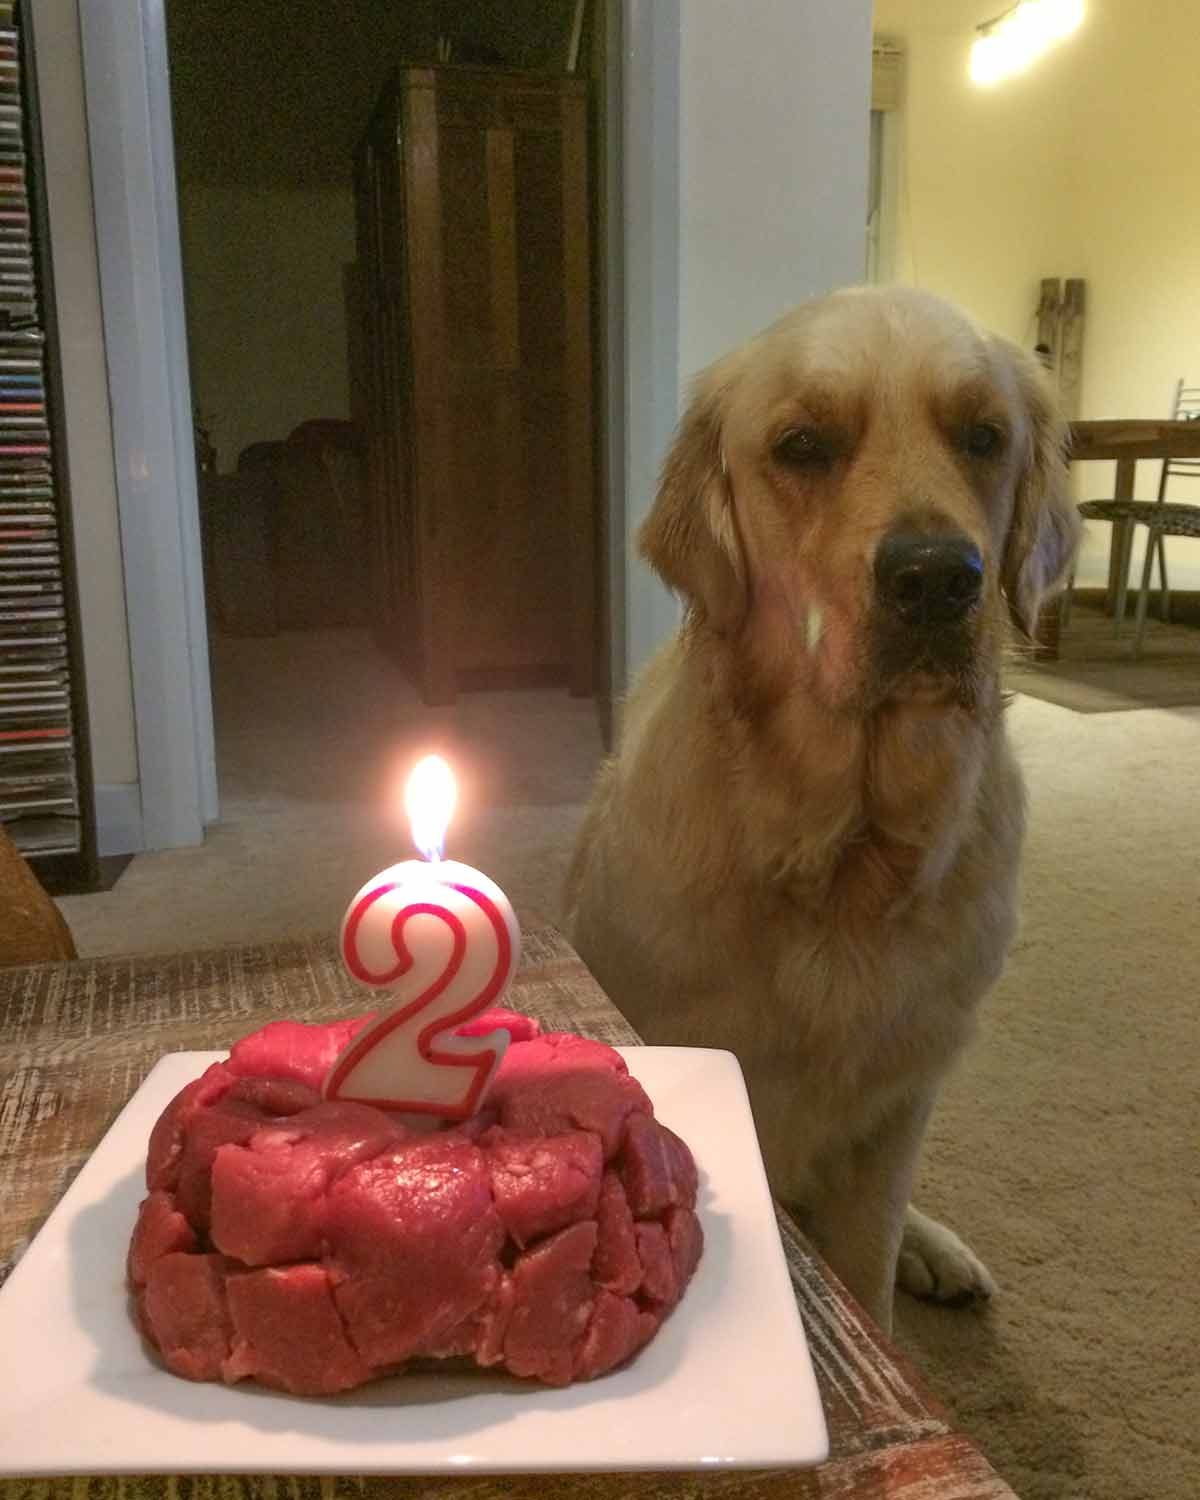
But then I started this website and with that came expectations! Fancier, taller, outrageously and increasingly unnecessary for a dog who would’ve been just as thrilled with a single sausage on a plate.
It started like this for his 6th birthday…

Then evolved to this for his 7th one, the infamous cake that that looked so real, my friend’s husband ate some, cocked his head and asked “what’s the frosting made of??” (Answer: mashed potato and yogurt 🤣).

Ah yes, that was the infamous cake I took down to the dog beach he took a chunk out of before the candle was lit!


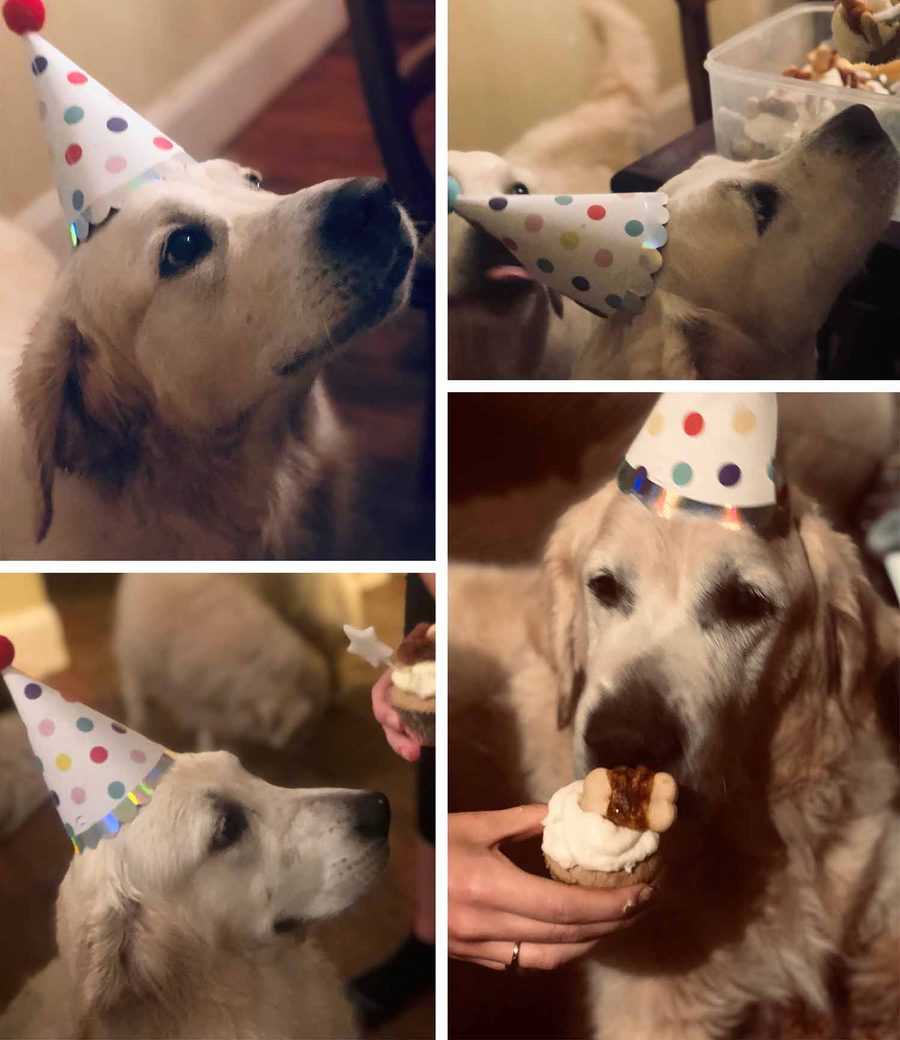
His 8th birthday was the year of the pupcakes, a little more humble one might think except it was also the year of COVID and therefore the year of virtual parties so I may or may not have delivered dozens upon dozens of pupcakes to Dozer’s friends all over Sydney for a series of virtual celebrations…..😆 Honestly, by that time, I think everyone was looking for any excuse to lift the lockdown boredom, and I did it with pupcakes!


And then there was the most outrageous of them all – the drip cake. I mean, what kind of crazy dog lady spends hours baking 4 layers, whisking frosting and perfecting a drip …… for a dog who’d demolish it in 10 seconds flat??!!

The answer is, of course, a crazy dog lady who loved him more than words ever really manage to capture. ❤️
~~~~~~~~~~~~~~~~~~~~
Happy birthday, my beautiful Dozer. I’m so grateful for the 13 birthdays I got to celebrate with you, and I wanted to share something celebratory and cheerful for the first one without you, to honour the joy you brought into my life, and our readers.
Here’s to tall cakes smothered with lots of creamy frosting, extra sprinkles, and celebrating you in the most over-the-top way you would’ve fully approved of! Love, your mum xx