This post may contain affiliate links. Read my full disclosure policy.
Thick, glossy, and bursting with real strawberry flavor, this small-batch strawberry jam tastes so much better than anything that comes from a jar. This is the kind of recipe you’ll find yourself making over and over again whenever fresh strawberries are in season.
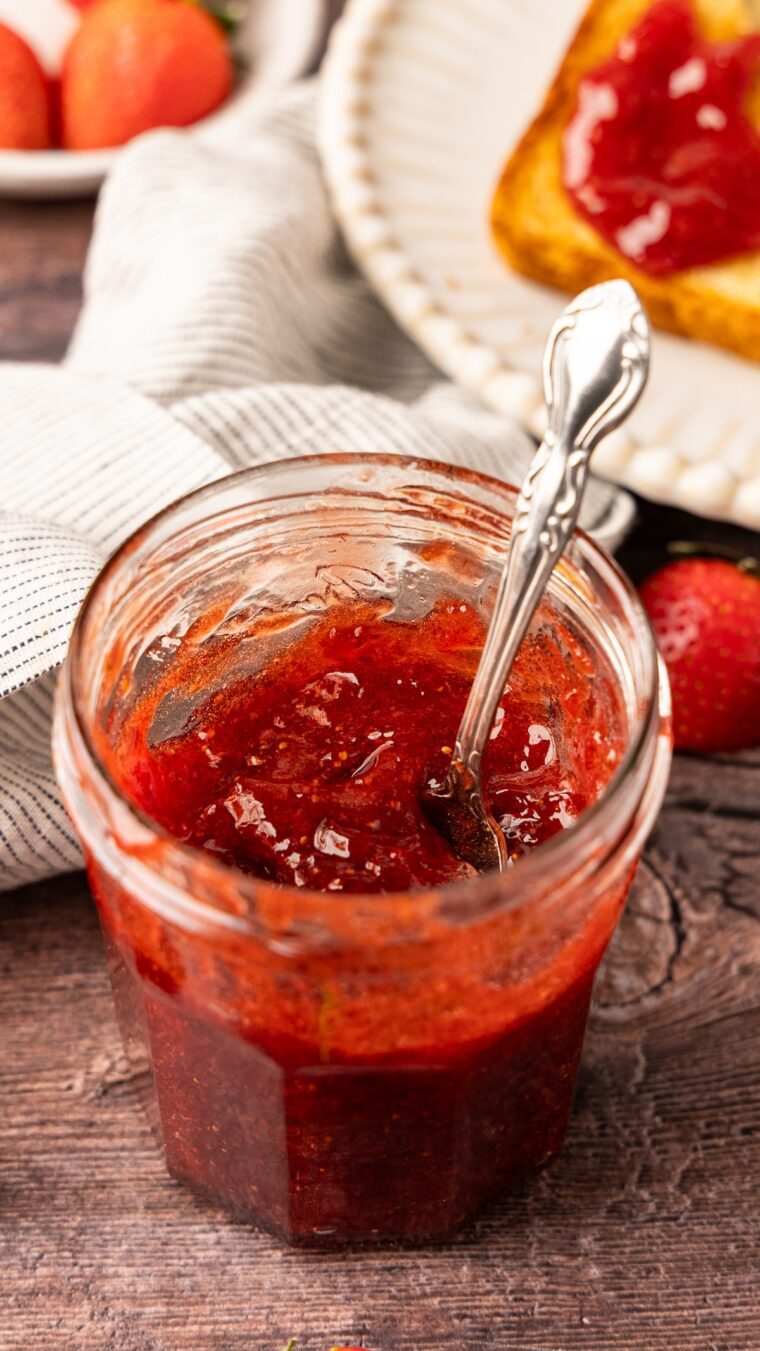
When strawberries are at their peak – sweet, juicy and piled high in markets and grocery stores – there’s nothing better than turning them into homemade jam. This small-batch version is wonderfully simple: just strawberries, sugar, and a squeeze of lemon juice cooked until thick and glossy.
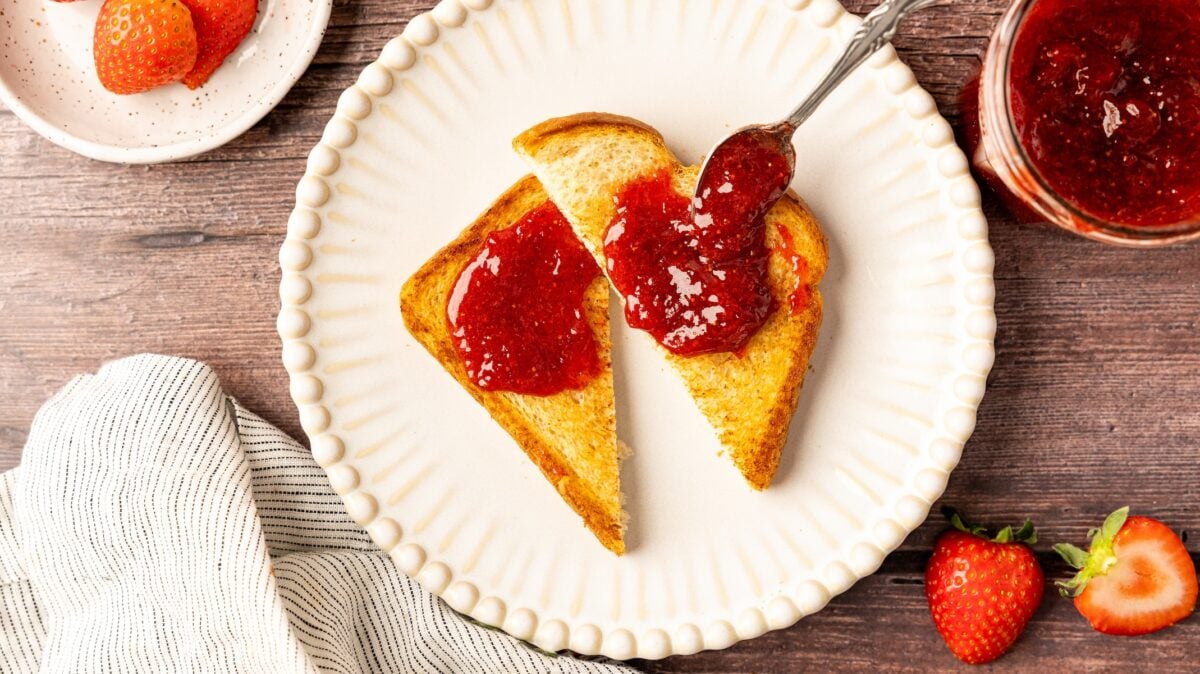
The jam is made without pectin and requires no canning, so it prepares in about 20 minutes and stores in the refrigerator for easy breakfasts and snacks. Pour it over yogurt, spread it on toast, or stir it into oatmeal—the fresh strawberry flavor really shines.
For a fun twist, substitute white balsamic vinegar for the lemon juice and add 1 teaspoon freshly ground black pepper. It adds a subtle sweetness and a gentle peppery touch that’s especially good with savory pairings: think a charcuterie board or cheese and crackers.
Contents
What You’ll Need to Make Strawberry Jam
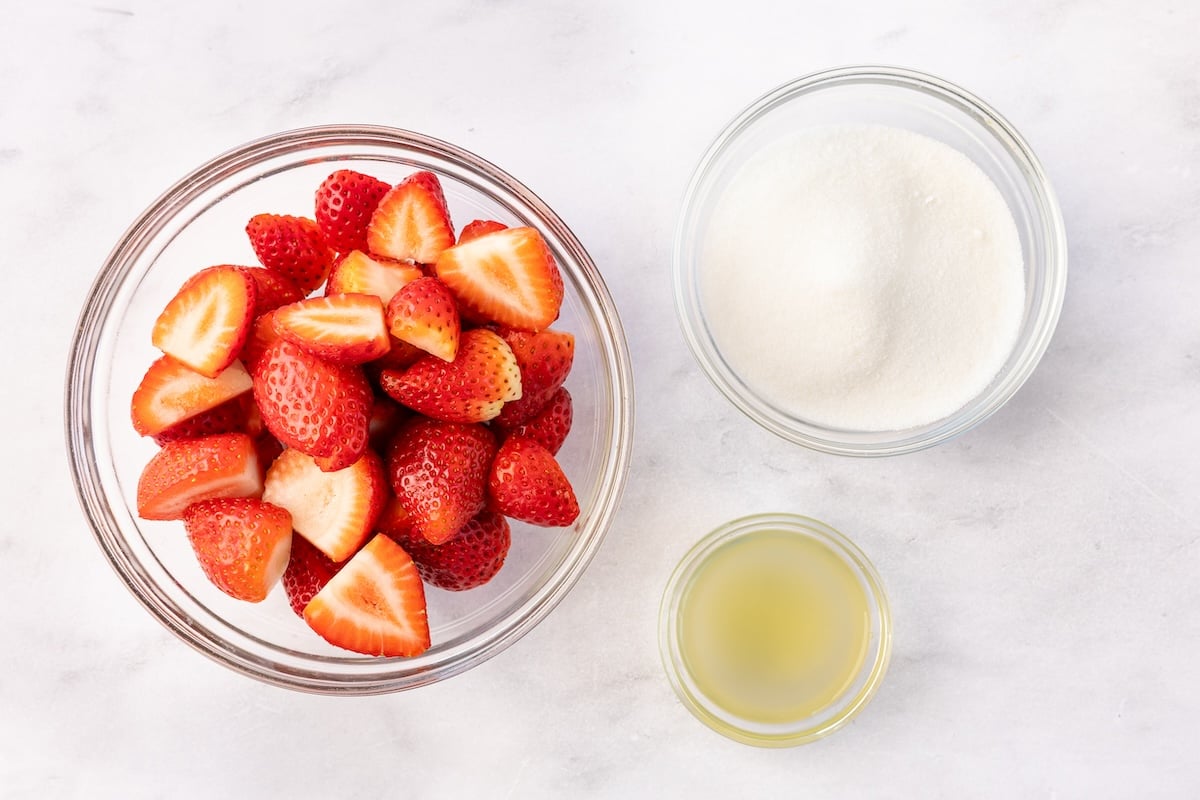
You will need strawberries, Powdered sugarAnd lemon juice to make homemade strawberry jam.
Step by step instructions
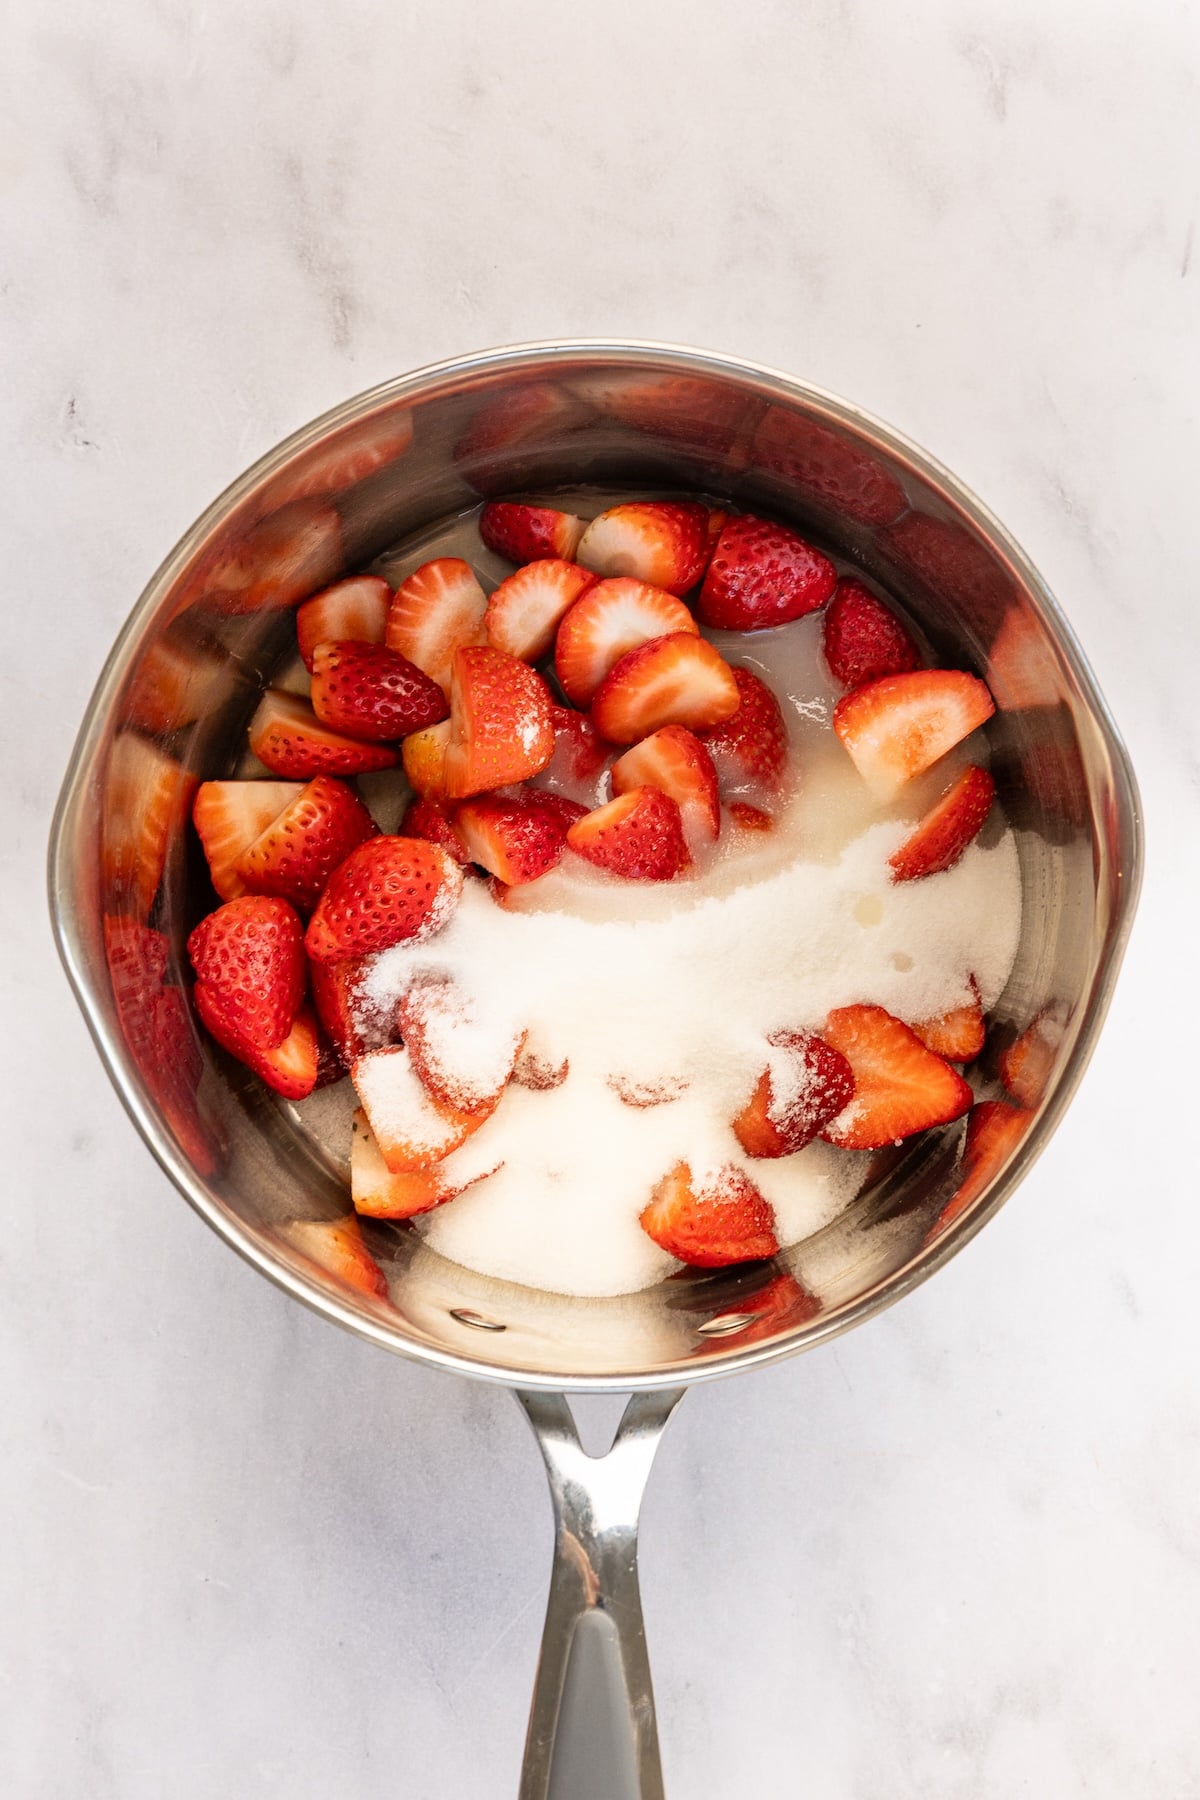
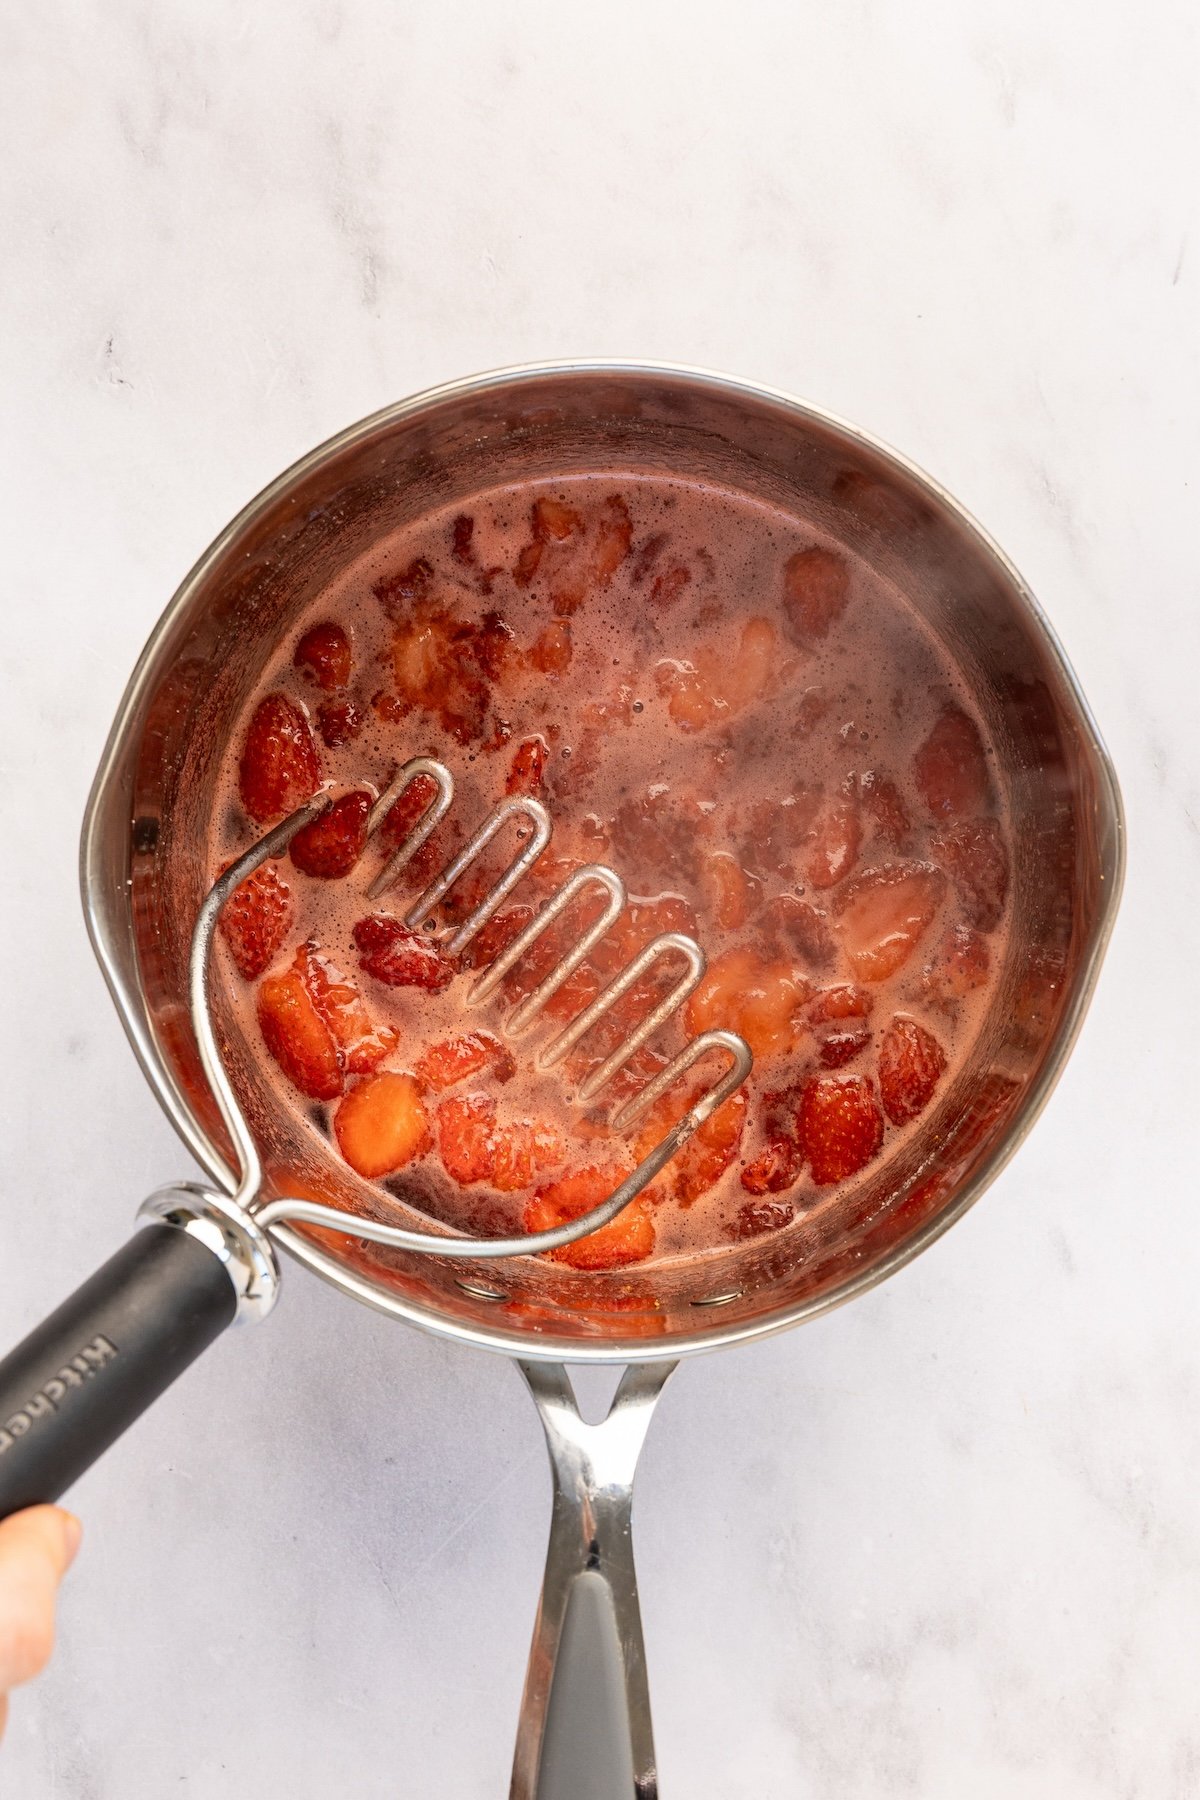
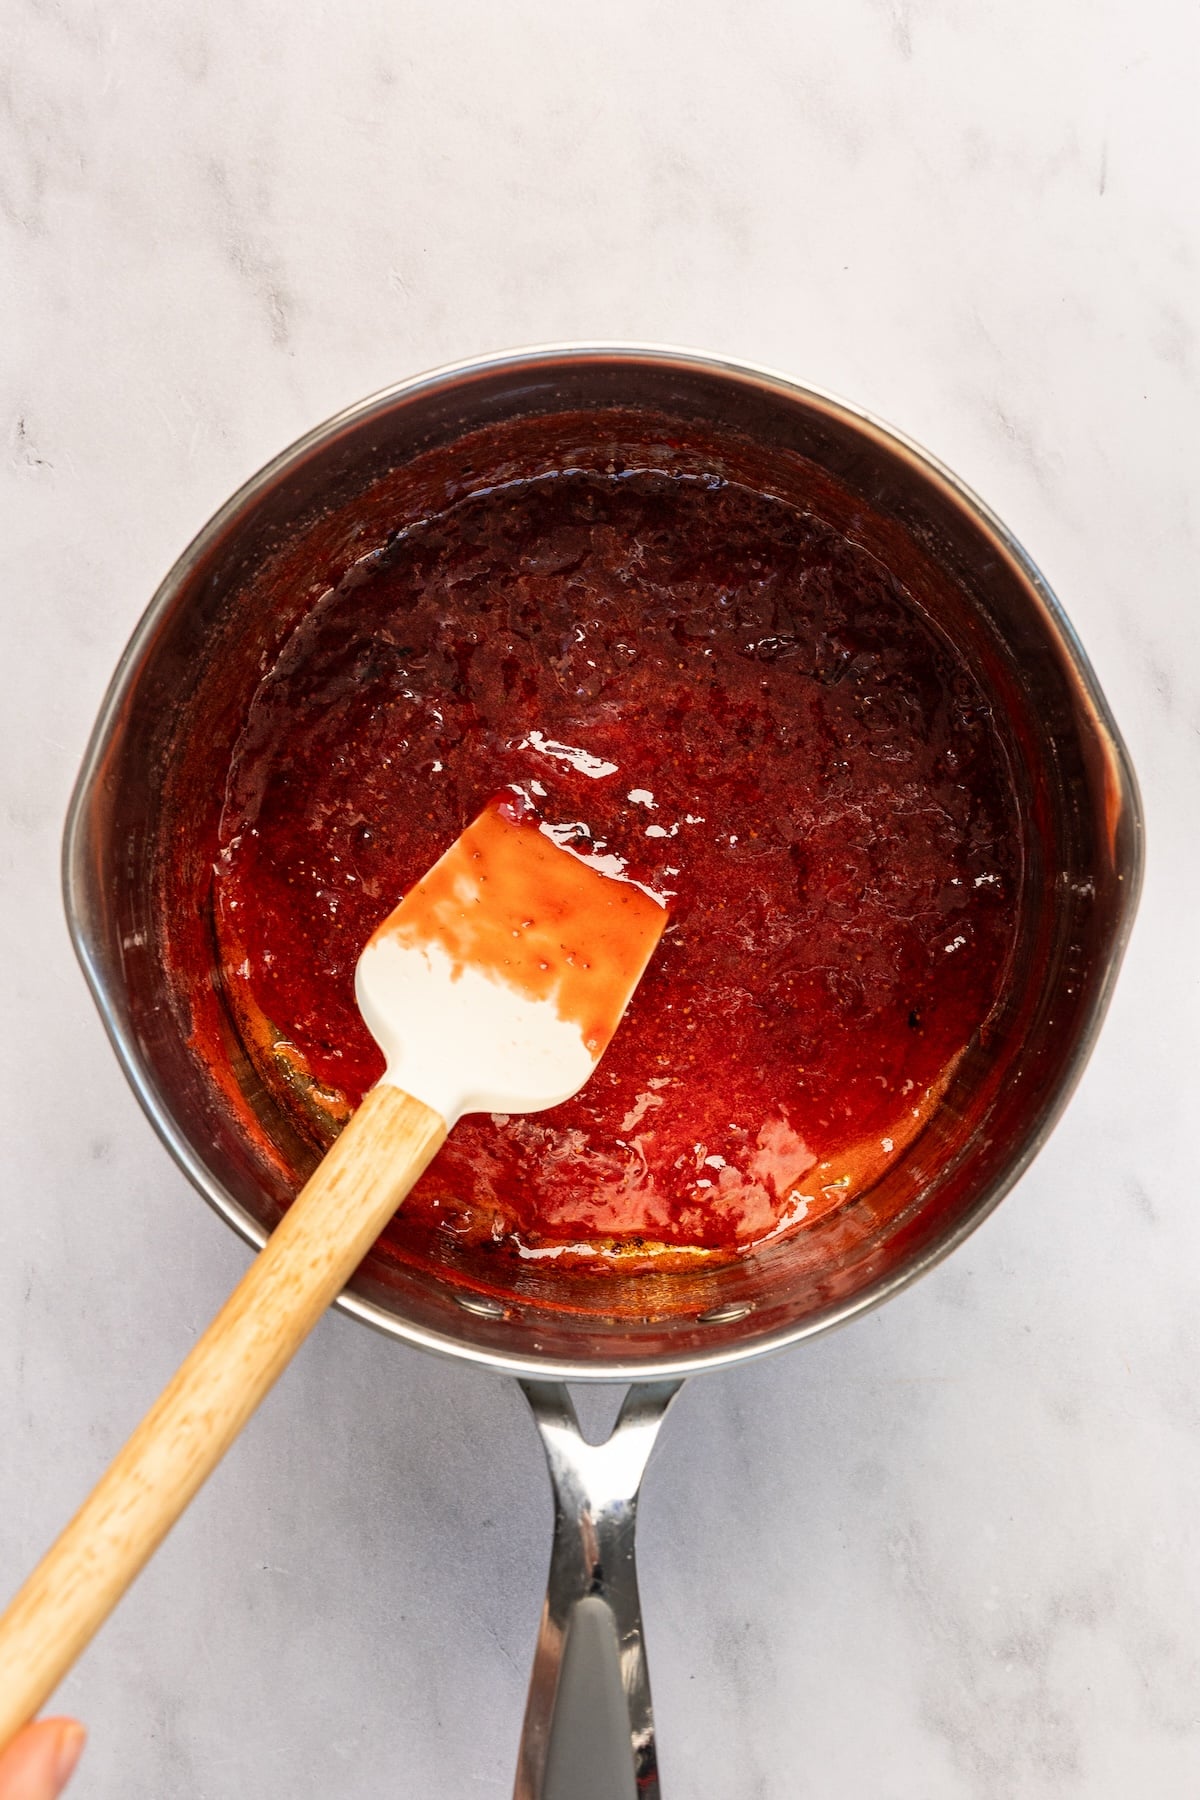
Step 1. Cook the jam. Before you begin, place two small plates in the freezer to chill. In a medium, heavy-bottomed saucepan, combine the strawberries, sugar and lemon juice. Cook over medium-high heat, stirring frequently, until the sugar dissolves and the mixture comes to a full boil, then reduce the heat to medium-low and simmer, stirring often and gently mashing the berries as they soften, until the jam thickens, 10 to 15 minutes.
Pro tip: Use a heavy-bottomed saucepan: high-sugar mixtures like jam burn easily because the sugar sinks and concentrates at the bottom during cooking. A thicker pan distributes heat more evenly and helps avoid hot spots that can burn the jam before it has time to thicken properly.

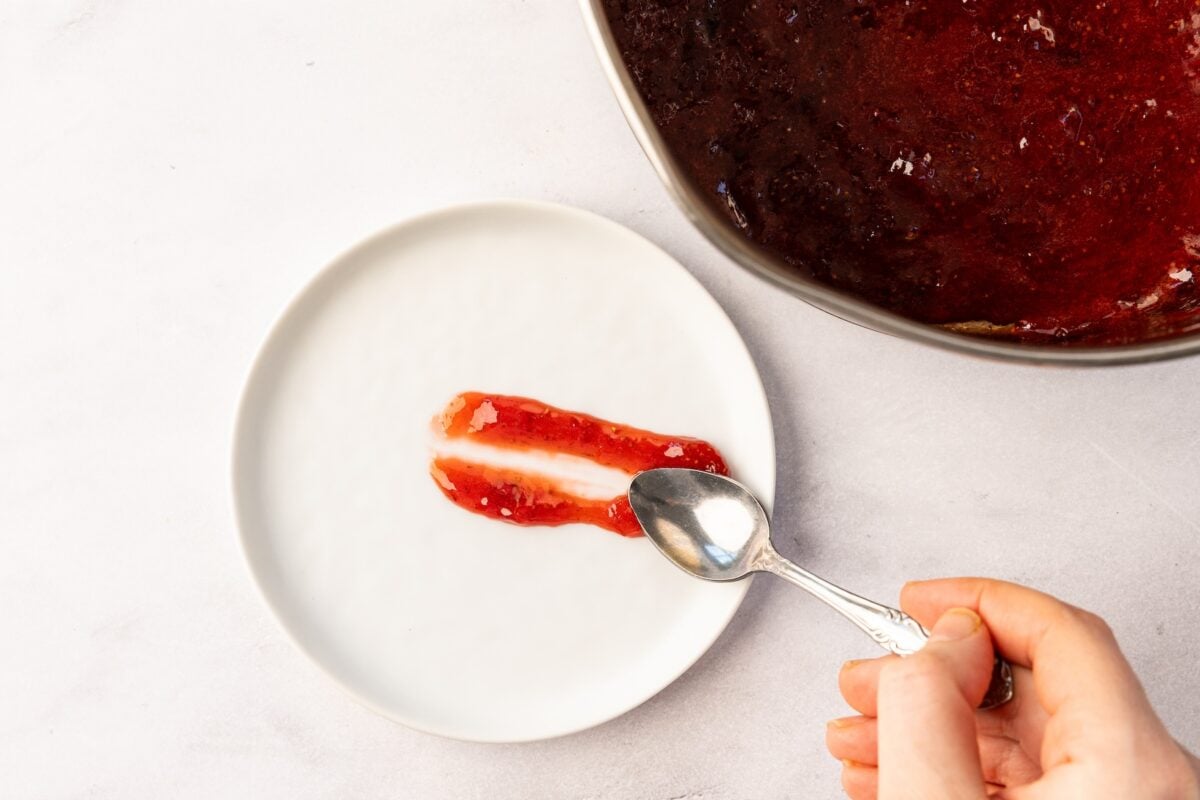
Step 2. Test for doneness. Pour a small amount of jam onto one of the chilled plates and let sit for a few seconds. Slide your finger or a spoon in: if the line holds, the jam is ready. If it reforms, continue cooking for a few more minutes and test again. (If you use a thermometer, the jam should reach about 220°F.)
Pro tip: The refrigerated plate test is more reliable than the clock. Cooking time may vary depending on the juiciness of the berries and the size of your pan, so trust the texture, not the timer.
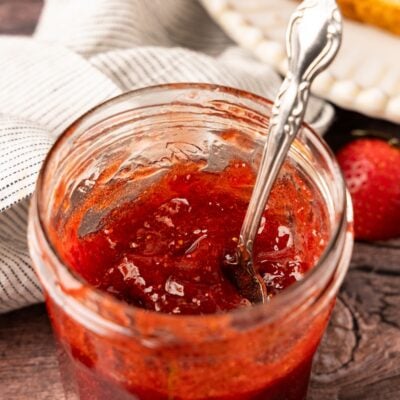
Step 3. Finish and store. Skim any foam from the surface, then allow the jam to cool slightly. Transfer to clean jars or airtight containers and refrigerate for up to 2 weeks, or freeze for up to 6 months.
MORE Fruit Recipes You’ll Love
Small Batch Strawberry Jam
A quick stovetop strawberry jam that sets beautifully without pectin. Simple, bright and perfect for toast, yogurt, oatmeal or on desserts.
Ingredients
- 16 ounce strawberries, hulled and cut in half
- ¾ cup Powdered sugar
- 2 tablespoons fresh lemon juice, from 1 lemon
Instructions
-
Before starting, place two small plates in the freezer so that they are very cold: you will use them later to check if the jam is set. (The second plate is a backup in case the jam needs a little more time to cook.) If you don’t use the second plate, be sure to take it out of the freezer when you’re done.
-
In a medium, heavy-bottomed saucepan, combine the strawberries, sugar and lemon juice. Place the saucepan over medium-high heat and cook, stirring frequently, until the sugar dissolves and the mixture comes to a full boil. Reduce heat to medium-low and simmer, stirring often and gently mashing the berries as they soften (a potato masher or the back of a sturdy spatula works well), until the jam thickens, 10 to 15 minutes.
-
To check for doneness, place a small spoonful of jam on a chilled plate and let sit for a few seconds. If you can slide your finger across it and the line holds (instead of coming back together), it’s ready. If it still seems loose, continue cooking for a few more minutes and test again. (If you have a candy thermometer, the jam is done when it reaches about 220°F/104°C.)
-
Skim any foam from the surface of the jam using a small spoon.
-
Let the jam cool slightly, then transfer it to clean jars or airtight containers. Refrigerate for up to 2 weeks or freeze for up to 6 months.
Nutritional information
Portion: 1tablespoonCalories: 27kilocaloriesCarbohydrates: 7gSugar: 6g
This website is written and produced for informational purposes only. I am not a certified nutritionist and the nutritional information on this site has not been evaluated or approved by a nutritionist or the Food and Drug Administration. Nutrition information is provided as a courtesy and should not be construed as a guarantee. Data is calculated via an online nutritional calculator, Edamam.com. Although I do my best to provide accurate nutritional information, these numbers should only be considered estimates. Various factors such as types of produce or brands purchased, natural fluctuations in fresh produce, and how ingredients are processed change the effective nutritional information of a given recipe. Additionally, different online calculators provide different results based on their own nutritional data sources and algorithms. To get the most accurate nutritional information in a given recipe, you should calculate the nutritional information with the actual ingredients used in your recipe, using your favorite nutritional calculator.
Gluten-free adaptable note
To the best of my knowledge, all ingredients used in this recipe are gluten free or widely available in gluten-free versions. There is hidden gluten in many foods; If you are following a gluten-free diet or cooking for someone with a gluten allergy, always read the labels on your ingredients to verify that they are gluten-free.

